Unified Adapter is a template that provides the ability to unify data from multiple sources, e.g. Adobe Analytics, Transactional, Product, customer, CRM, ID Graph, etc. Unifying multiple sources, leveraging our ID Graph capability, provides a single source of truth and stitches a customer's journey.
Contents:
- Prerequisites: covering what is required in order to setup a new unified app
- Creating a new app
- Configure: How to configure unified event enrich process
- Testing the configuration ind development
- Running and scheduling a job in production
Prerequisites
The following screens need to be populated before configuring this app:
- Infrastructure - All required fields populated with the environment details of your on-premise, Google Cloud Platform, or AWS account.
- Event Store - Where data will reside in your cloud environment or HDFS cluster.
- ID Store - Where data will reside in your cloud environment or HDFS cluster.
App creation
- Click on the menu icon (
 ) and under Apps select "Workflow" from the sub-menu.
 - Click the green plus sign button (
 ) on the top right of your screen and select New App.
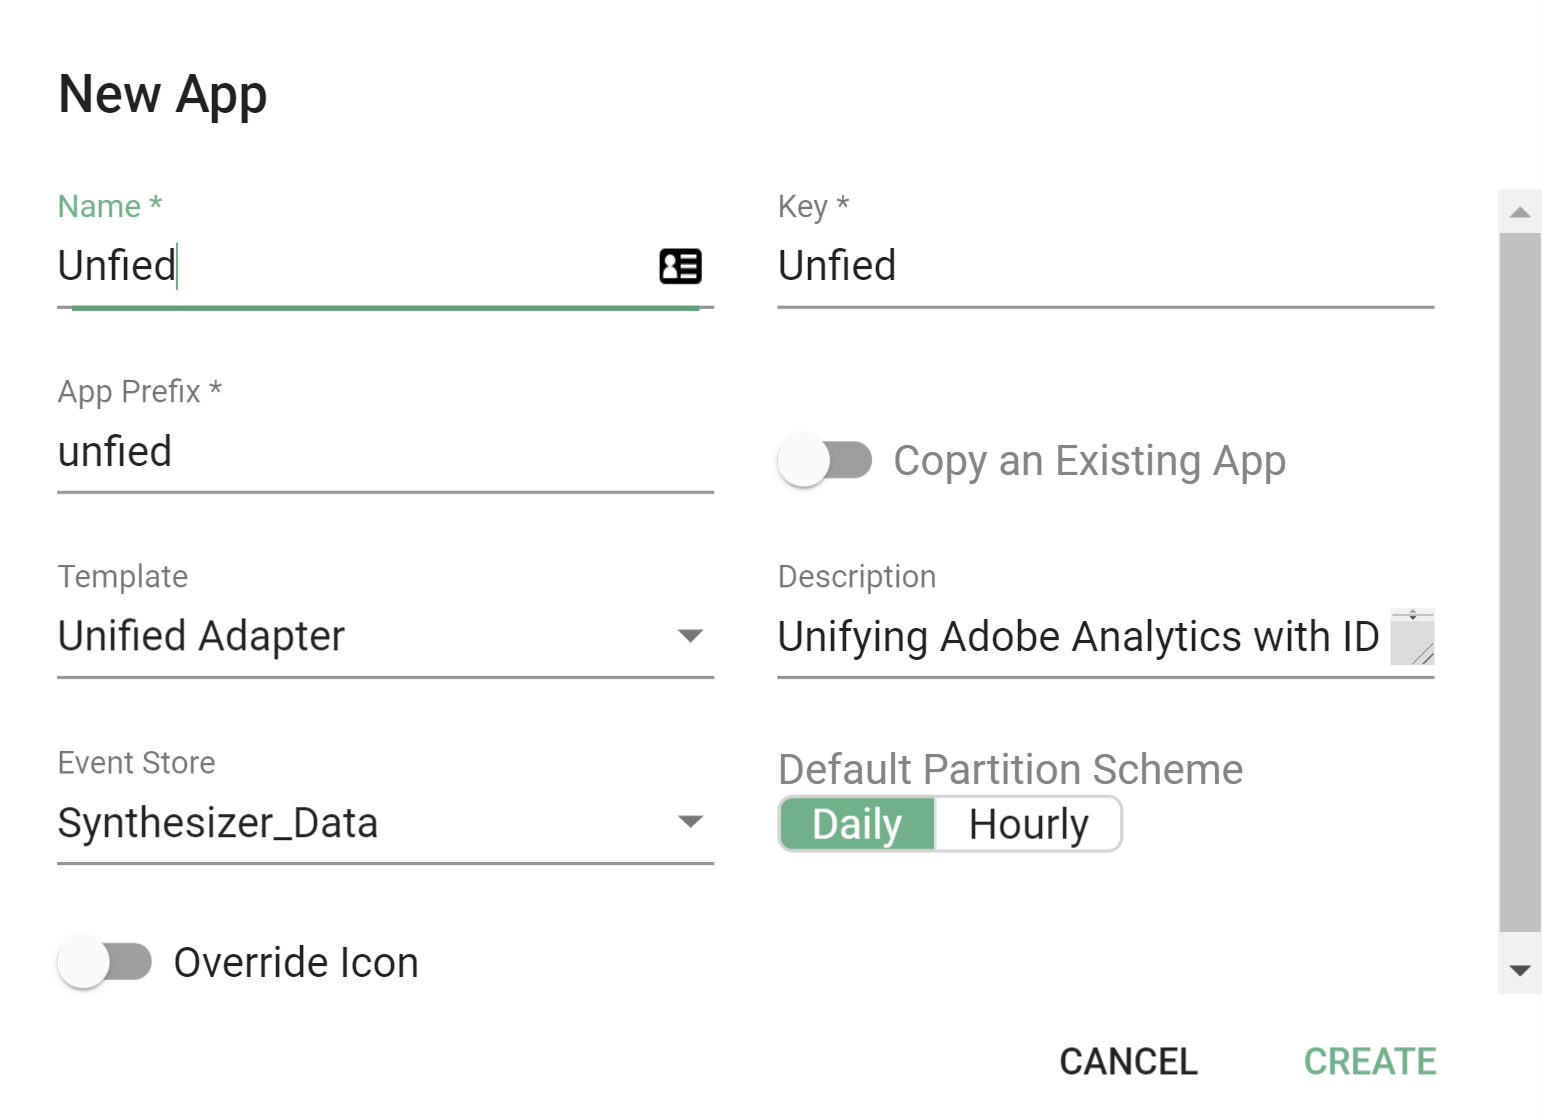
 - Fill in the New App screen:
- Name - Display the name of your new Unified Adapter application.
- Key - Will automatically populate based on the name you enter.
- App Prefix - Will automatically populate based on the name you enter, you are able to change this if you prefer something else.
- Template - Choose your app template, in this case, Unified Adapter.
- Description - Purely informational text field.
- Event Store - Drop down where you can choose your pre-configured event store.
- Override Icon - Toggle button, only need to turn on if you would like to use a custom icon.
- Click 'Create'.
Configure Unified Adapter
It's worth noting that it is possible to create a Unified Adapter without ID Graph data being added to provide identity stitching. Therefore, in the below guide, we've indicated two optional steps that relate to adding ID Store (ID Graph output) inputs onto the workflow.
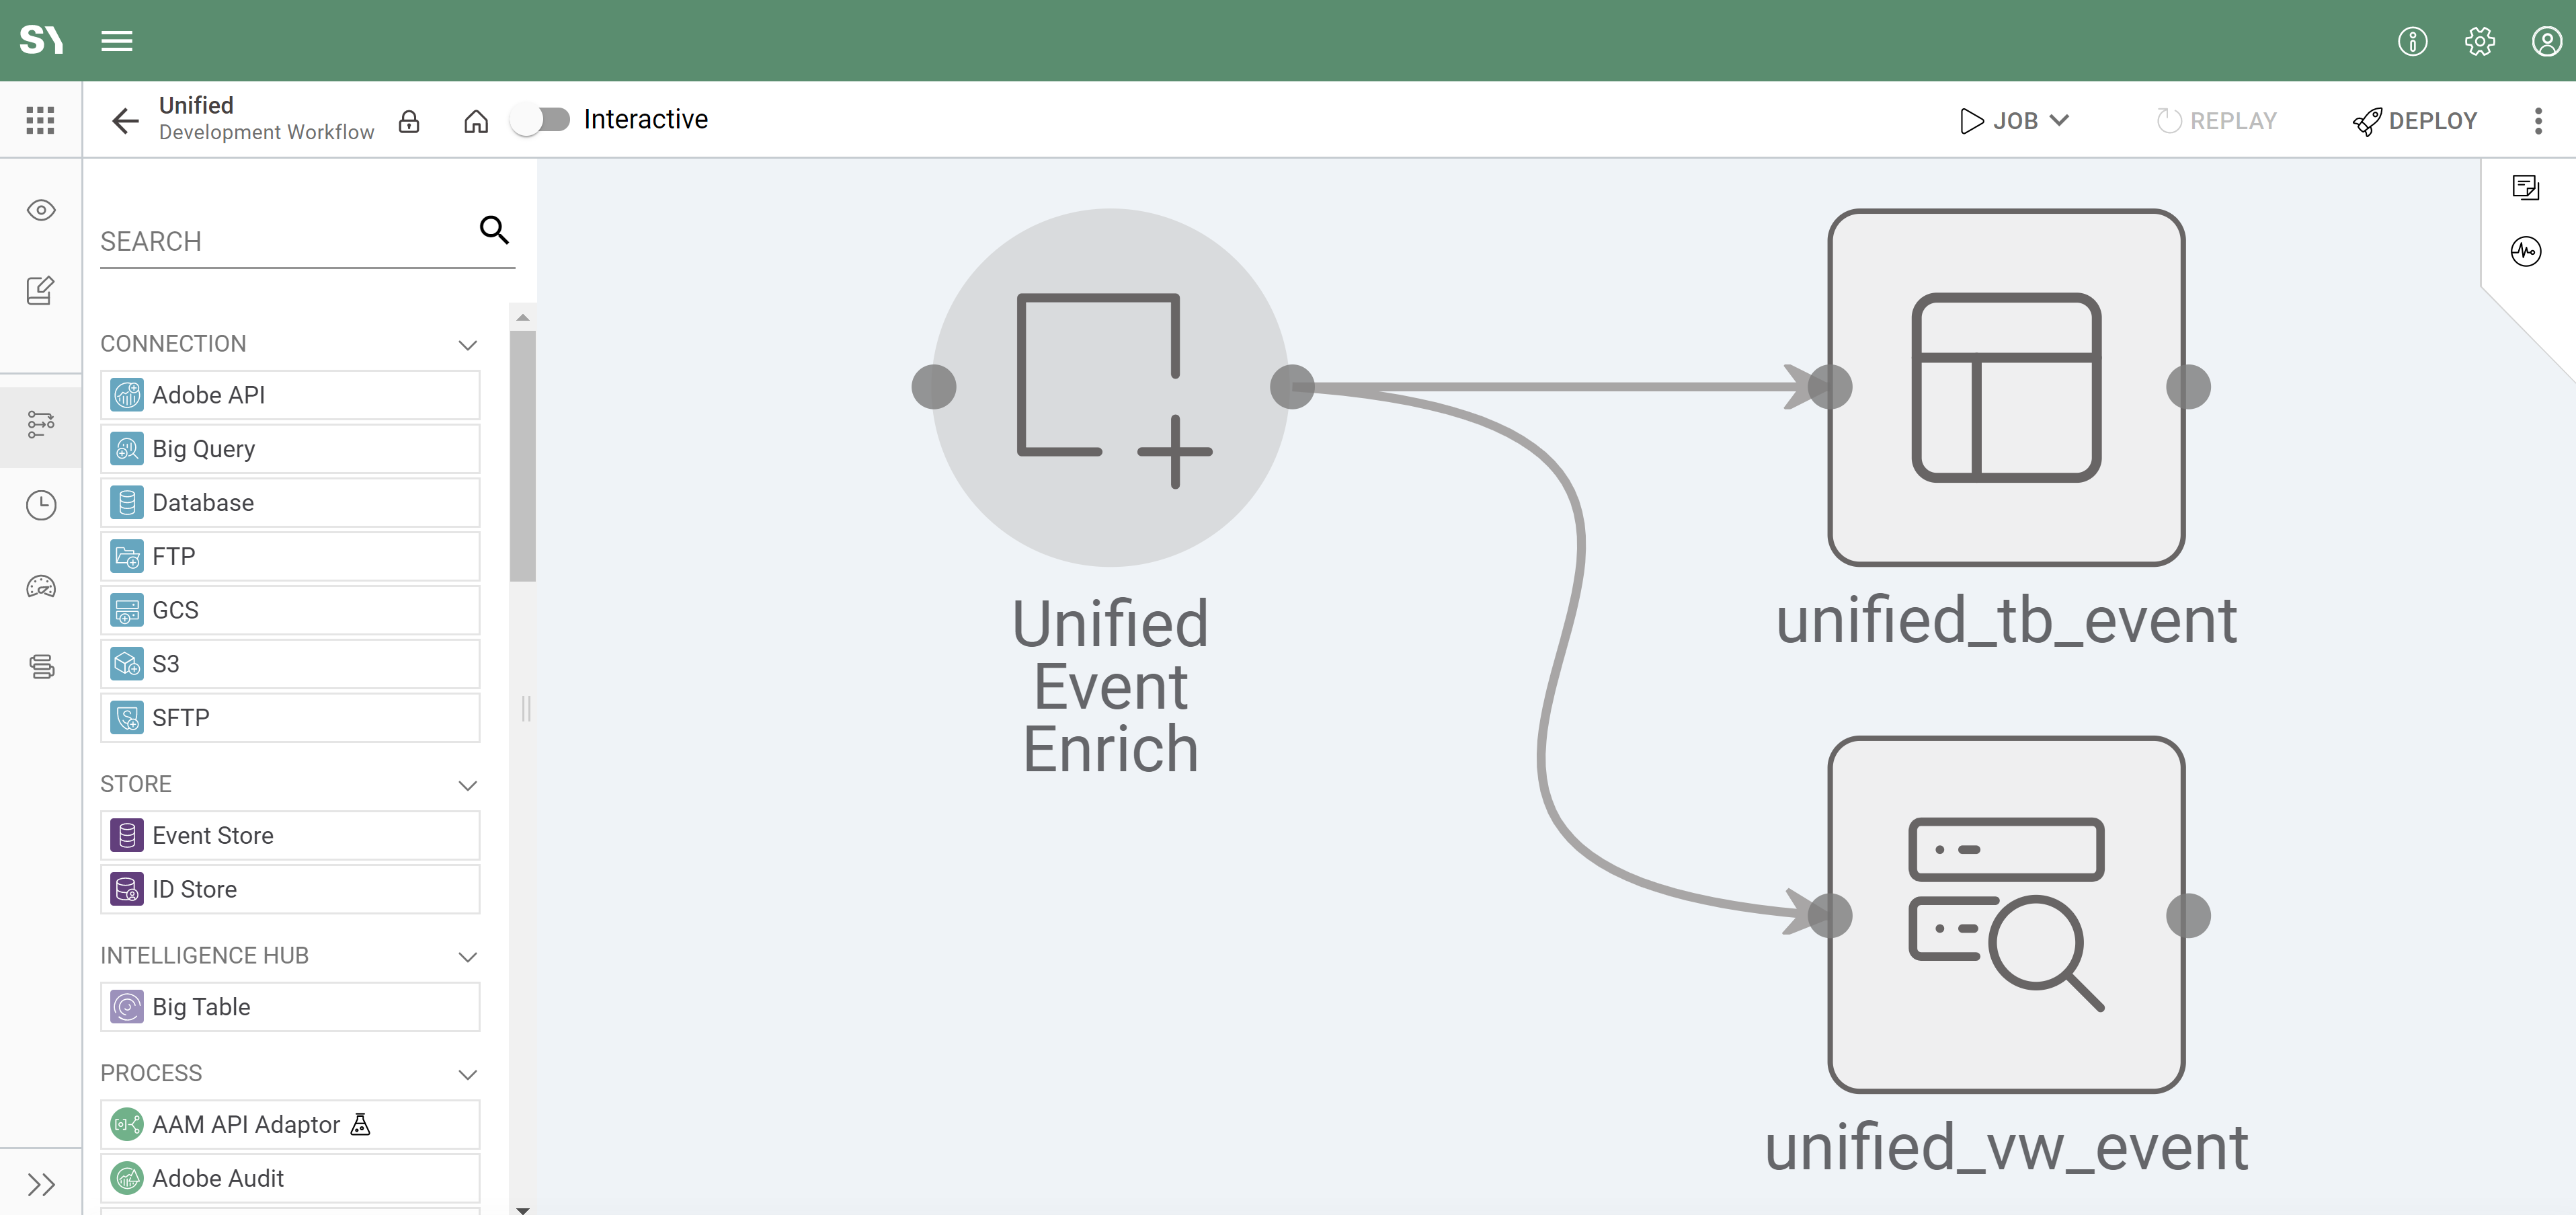
- Find your new app and click on it to open.
- The workflow will look like the screenshot below. We will then drag in our data sources, which will be tables generated by other apps.
- Click the lock icon (
 ) on the top-left to unlock the workflow.
 - From the left side menu, under Stores drag an Event Store (
 ) on to the workflow.
 - Click on the Event Store on the workflow and populate the two dropdowns:
- Select the Event Store, if you have a long list type the name of your list.
- Select the Dataset, again if you have a long list type the name of your list.
- Click on the tick box on the right to save.
- Repeat step 5 for all of the sources you want to unify. For this guide, we're unifying two Adobe sources.
- Click on the Event Store (color will change to purple) edge connection and drag to the Unified Event Enrich.
- (Optional) From the left-side menu, under Stores, drag an ID Store () on to the workflow. In order to add ID Store data, you should have already created and processed an ID Graph app in production.
Repeat steps 5 and 6 but for ID Store. For this guide, we're adding only one ID Graph source, but it is possible to have multiple ID sources.
- Before we start editing, from the left-side menu let's drag onto the workflow the one additional Unified Event Enrich. If you do not see Unified Event Enrich you can use the search bar on the left-side menu to search for it.
- Unified Event Enrich process is now enabled for editing. Click on either of the Unified Event Enrich processes.

- You are now asked to alias your Event Store Data, meaning this is what the app will expect when mapping columns in a field titled "Function" and writing enrichment. We recommend you use a simple but consistent naming convention for the table that everyone in your organization will know.
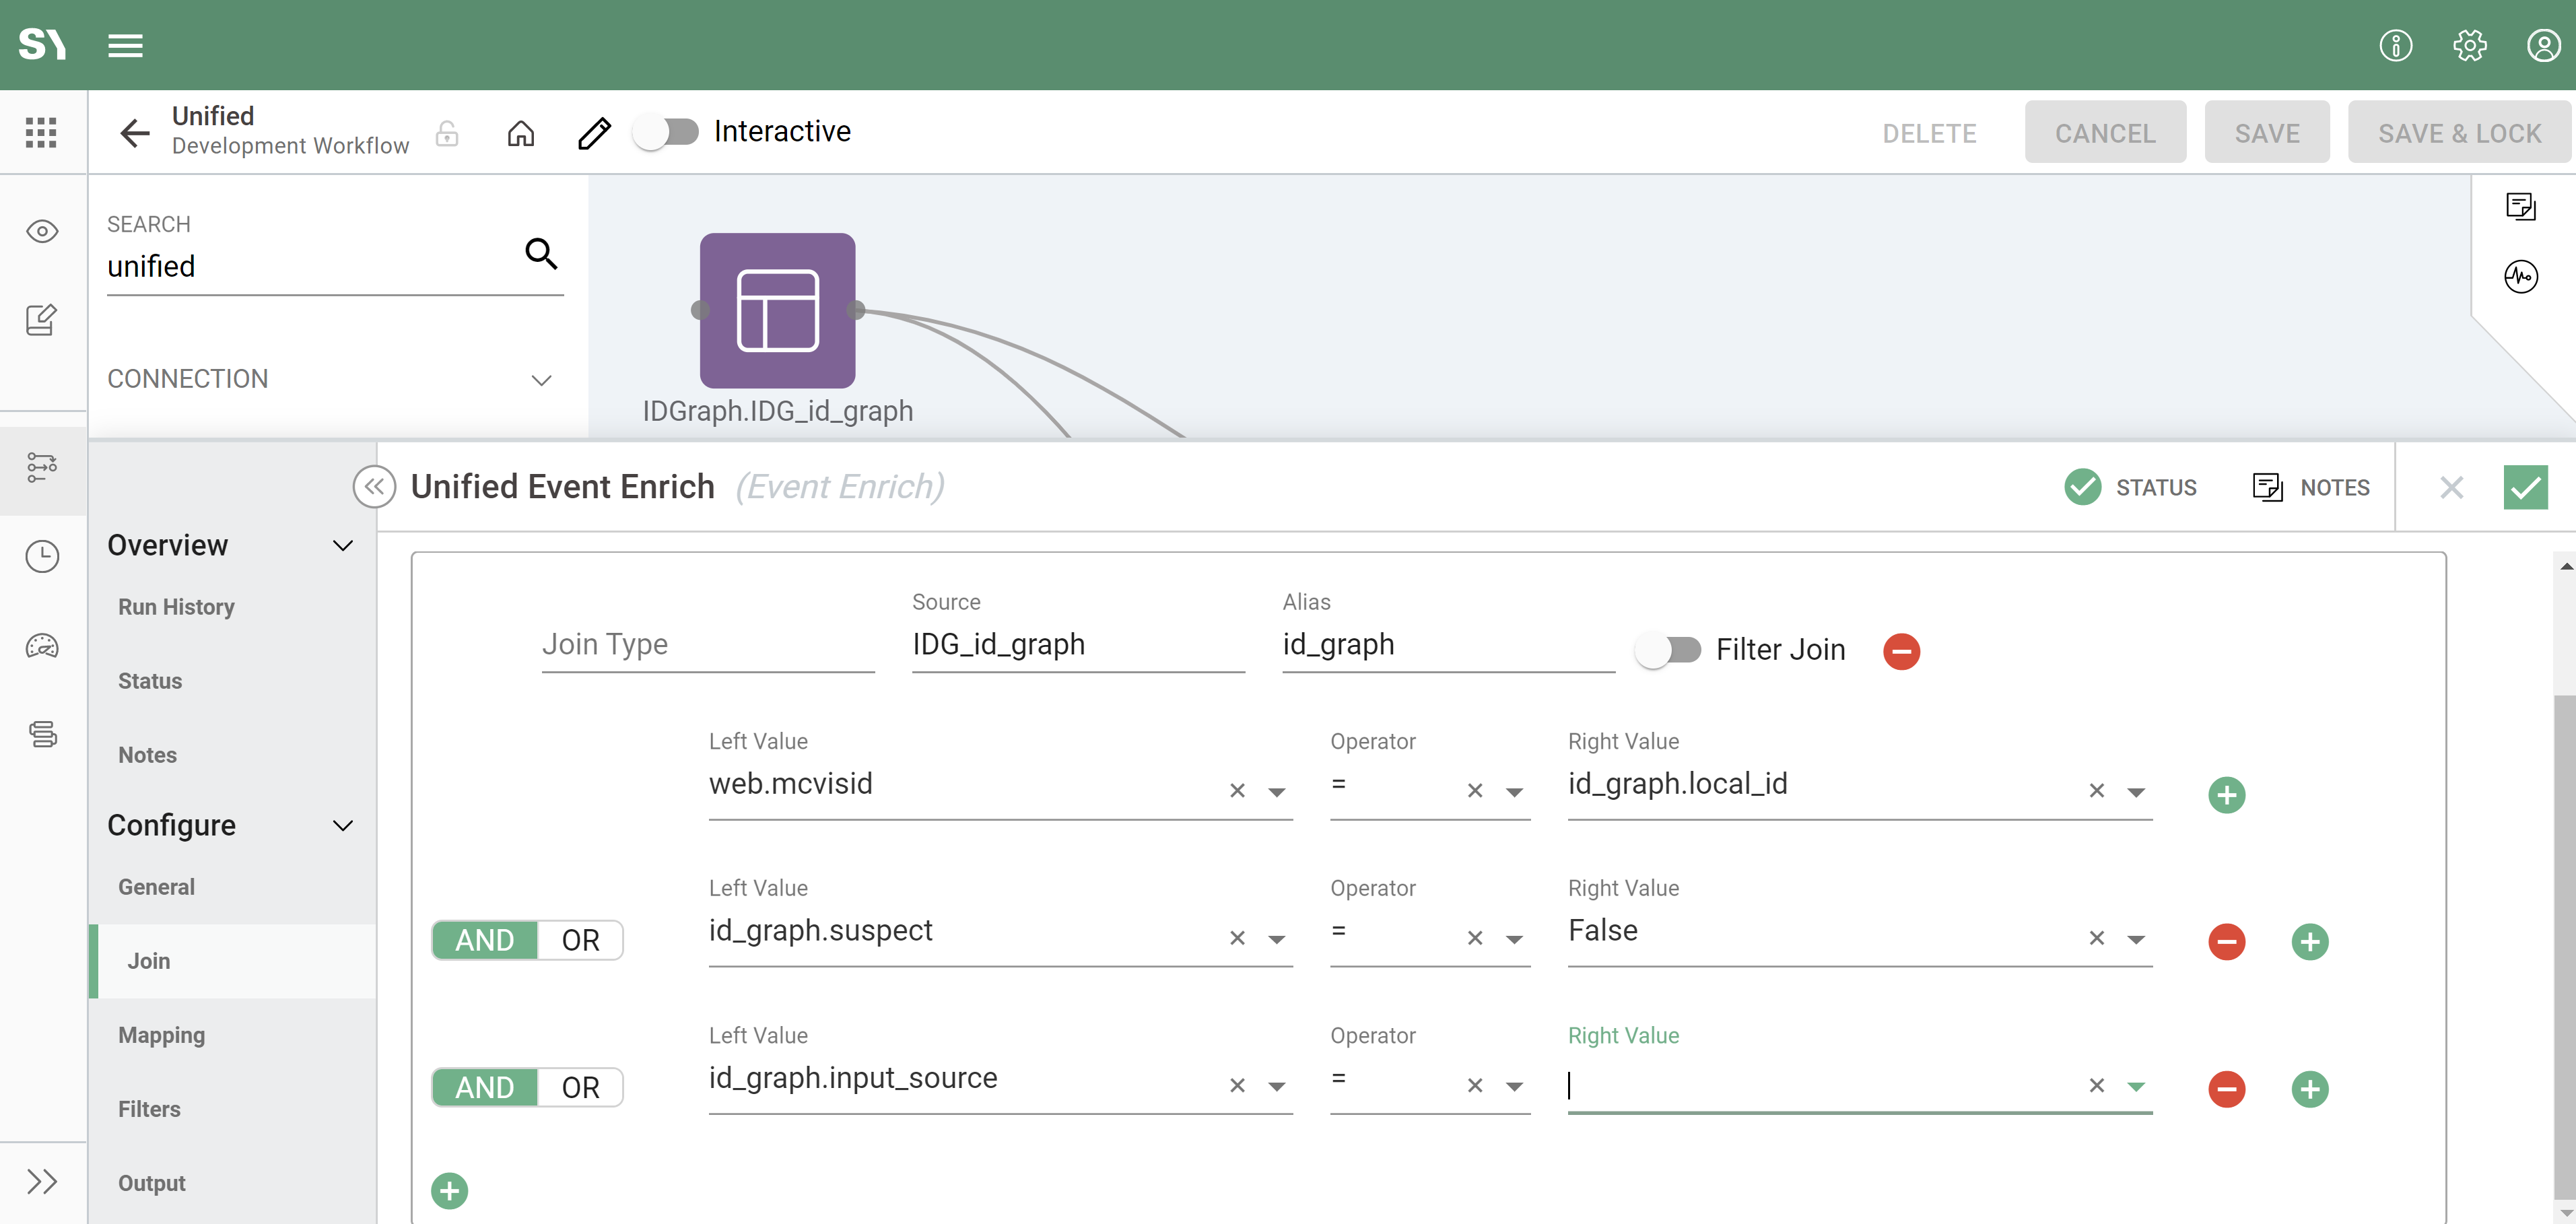
- (Optional) Now let's add the ID Graph data set as join (see the below screenshot):
- Click on the "+" under Joins:
- Join Type - Left
- Source - Select your ID Graph source from the dropdown.
- Alias - Typically most clients prefer "id_graph" as an Alias.
- Filter Join - This is not needed here. A filter is needed for:
- Avoids reading of unnecessary data from the lookup table.
- It is beneficial only when lookup (secondary table ) is big.
- It helps spark perform some optimization while doing product/event enrich.
- It extracts only values(let's say Product ID) that are present in the main table from the lookup table and performs the join.
- Left Value - Select from the dropdown your local ID, for us it is mcvisid. The Local ID is typically an anonymous ID such as a cookie field (example in Adobe Analytics this is visitor_id/mcvisid).
- Operator - "="
- Right Value - Select from the dropdown id_graph.local_id.
- Now click the + on the right of the "Right Value".
- Now let's repeat to add two more conditions to the join, by click "+" on the right:
- Left Value - id_graph.suspect
- Operator - "="
- Right Value - "False"
- Let's go ahead and add the second condition:
- Left Value - id_graph.input_source
- Operator - "="
- Right Value - This will be the input_Source from Registry Identity process in ID Graph.
- Now save the changes by clicking the checkbox (
 ) on the right.
- Now click on the other Event Enrich and repeat steps 9 and 10 from above.
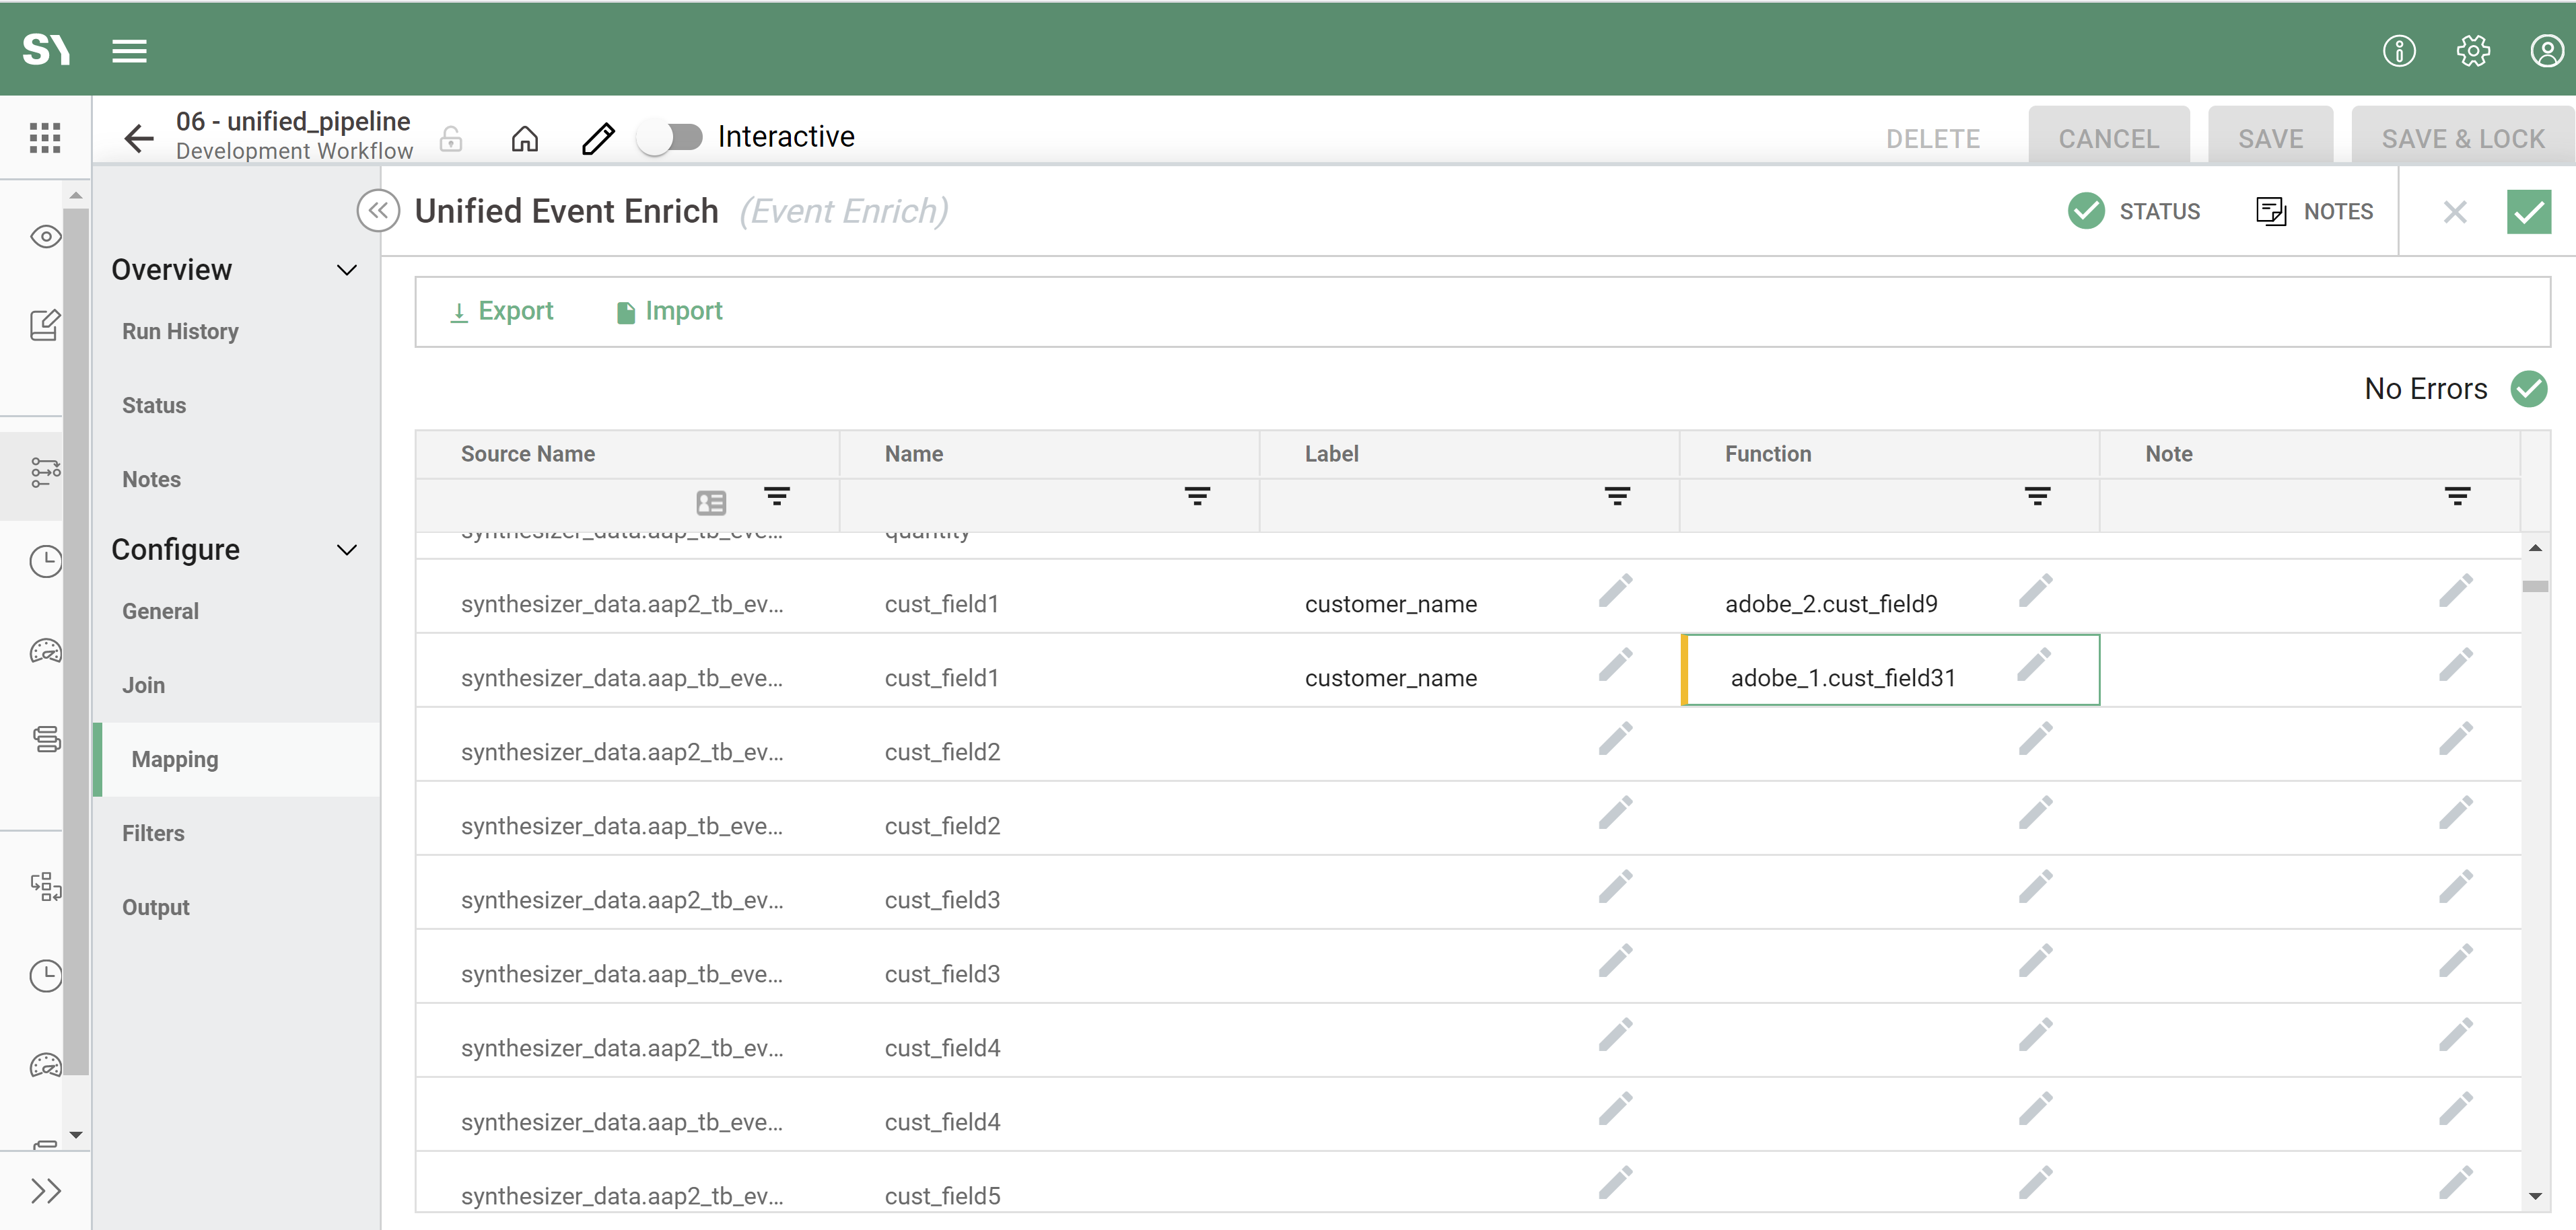
- Mapping - Now click on either unified event enrich and click on "Mapping" on the left menu on the new window being displayed. You only need to edit one mapping screen in one Unified Event Enrich process. The mapping screens will be identical and any changes made to one will also show in the other. All changes can also be made via excel by clicking "Export" to generate and download a CSV.
- Source Name - Represents the input source for which you are bringing into unified (non-editable).
- Name - Default schema header in the table (non-editable).
- Label - The labels autocomplete, populated with the fields from the input tables.
- Function - This is where we write our enrichment, this can be one of the following:
- Combining columns into one column. For example, customer_name might be cust_name in one report and first_name in another. In unified we can combine these as we will have one column for both report suites that we might call customer_name. This would be achieved by typing report_name.field_name_in_source.
- You can write custom logic like regex or a case statement.
- Filter - Click on "Filter" on the left-side menu, we don't need to edit unless we identify something during testing that we would like to filter out:
- Avoids reading of unnecessary data from the lookup table.
- Beneficial only when lookup (secondary table) is big.
- It helps spark perform some optimization while doing product/event enrich.
- It extracts only values(like Product ID) that are present in the main table from the lookup table and performs the join.
- Output - Click on the Output tab on the left, and check:
- The table name, you are able to update this if you have a specific naming convention.
- The Display name on the workflow.
- Under configurations. These are default settings, please don't modify them without a conversation with Syntasa consultants.
- Partition Schema - Daily
- File Format - Parquet
- Load to Big Query - Toggled ON (by default).
- Now save the changes by clicking tick () on the right.
- Click on the "+" under Joins:
Test in development
Now you're ready to test your configuration:
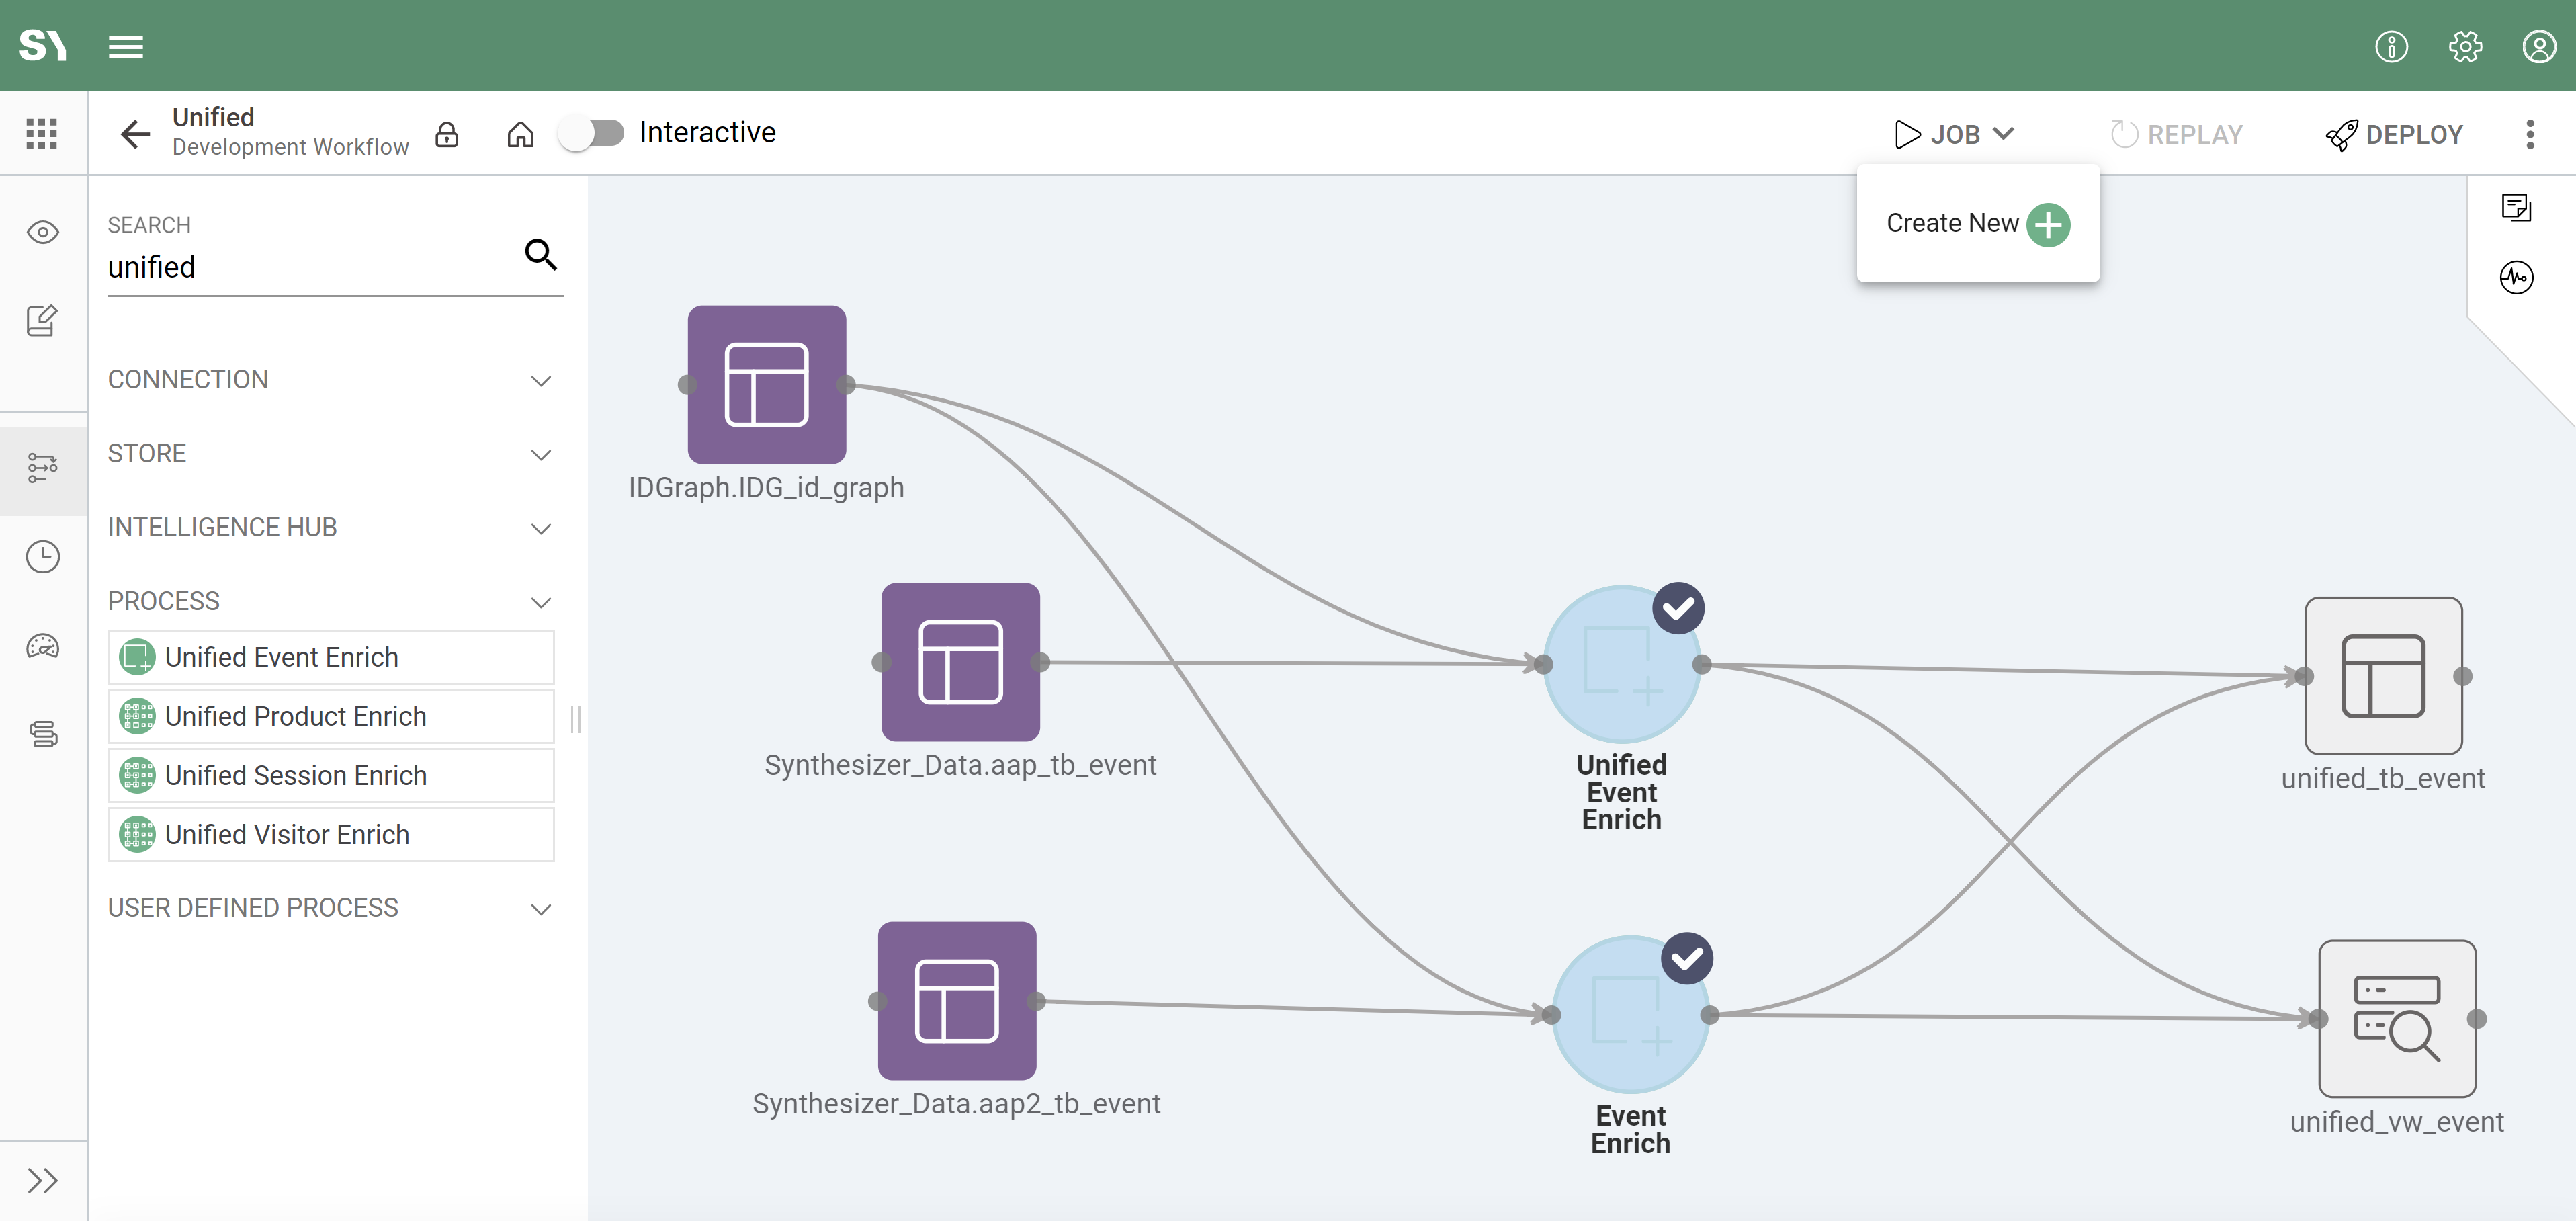
- To test the Unified Adapter, click on the nodes one by one while holding the shift key. The nodes will be highlighted in grey with a tick (see the below screenshot) to indicate it's been selected.
- Now click on the "Job" button on the top-right and then click "New Job" from the dropdown (see the screenshot below):
- You will now be presented with a window for configuring your job, let's populate the below:
- Name - Give the job a descriptive name, e.g. dev_unified_adapter.
- Description - Short description that is informative for the user.
- Tag - Tag the job.
- Process Name - Auto-populated, non-editable.
- Runtime - Runtime is a dropdown allowing us to choose the type/size of the cluster you want to use for processing.
- Process Mode - For the first run "Replace Date Range" is sufficient, however, if you are running multiple times during testing you may opt for "Drop and Replace" or "Add New and Modified". It's worth noting "Drop and Replace" is not advised for production as this will drop your data in Big Query.
- Date Range - Dropdown with several options, e.g. "Custom" that allows you to select the dates you want to process (From Date / To Date); "Last N Days" that allows you to select a relative date range. For our purposes, we are using "Custom" so we will have to enter two dates.
- Preview Record Limit - Leave default setting.
- Default Test File Limit - Leave default setting.
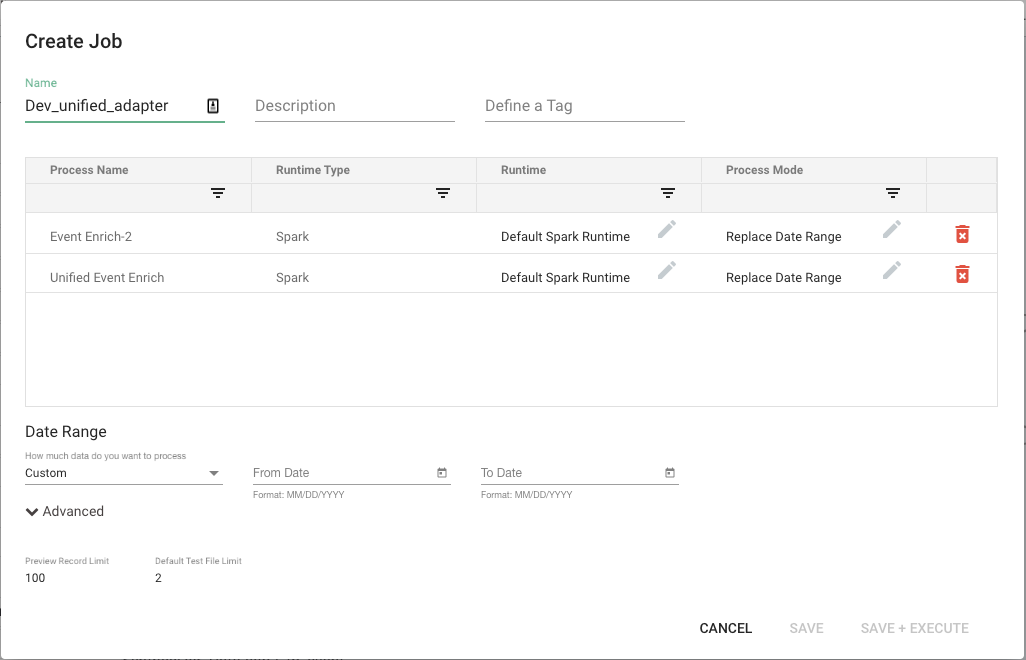
- Click on "Save & Execute" and the job will start.
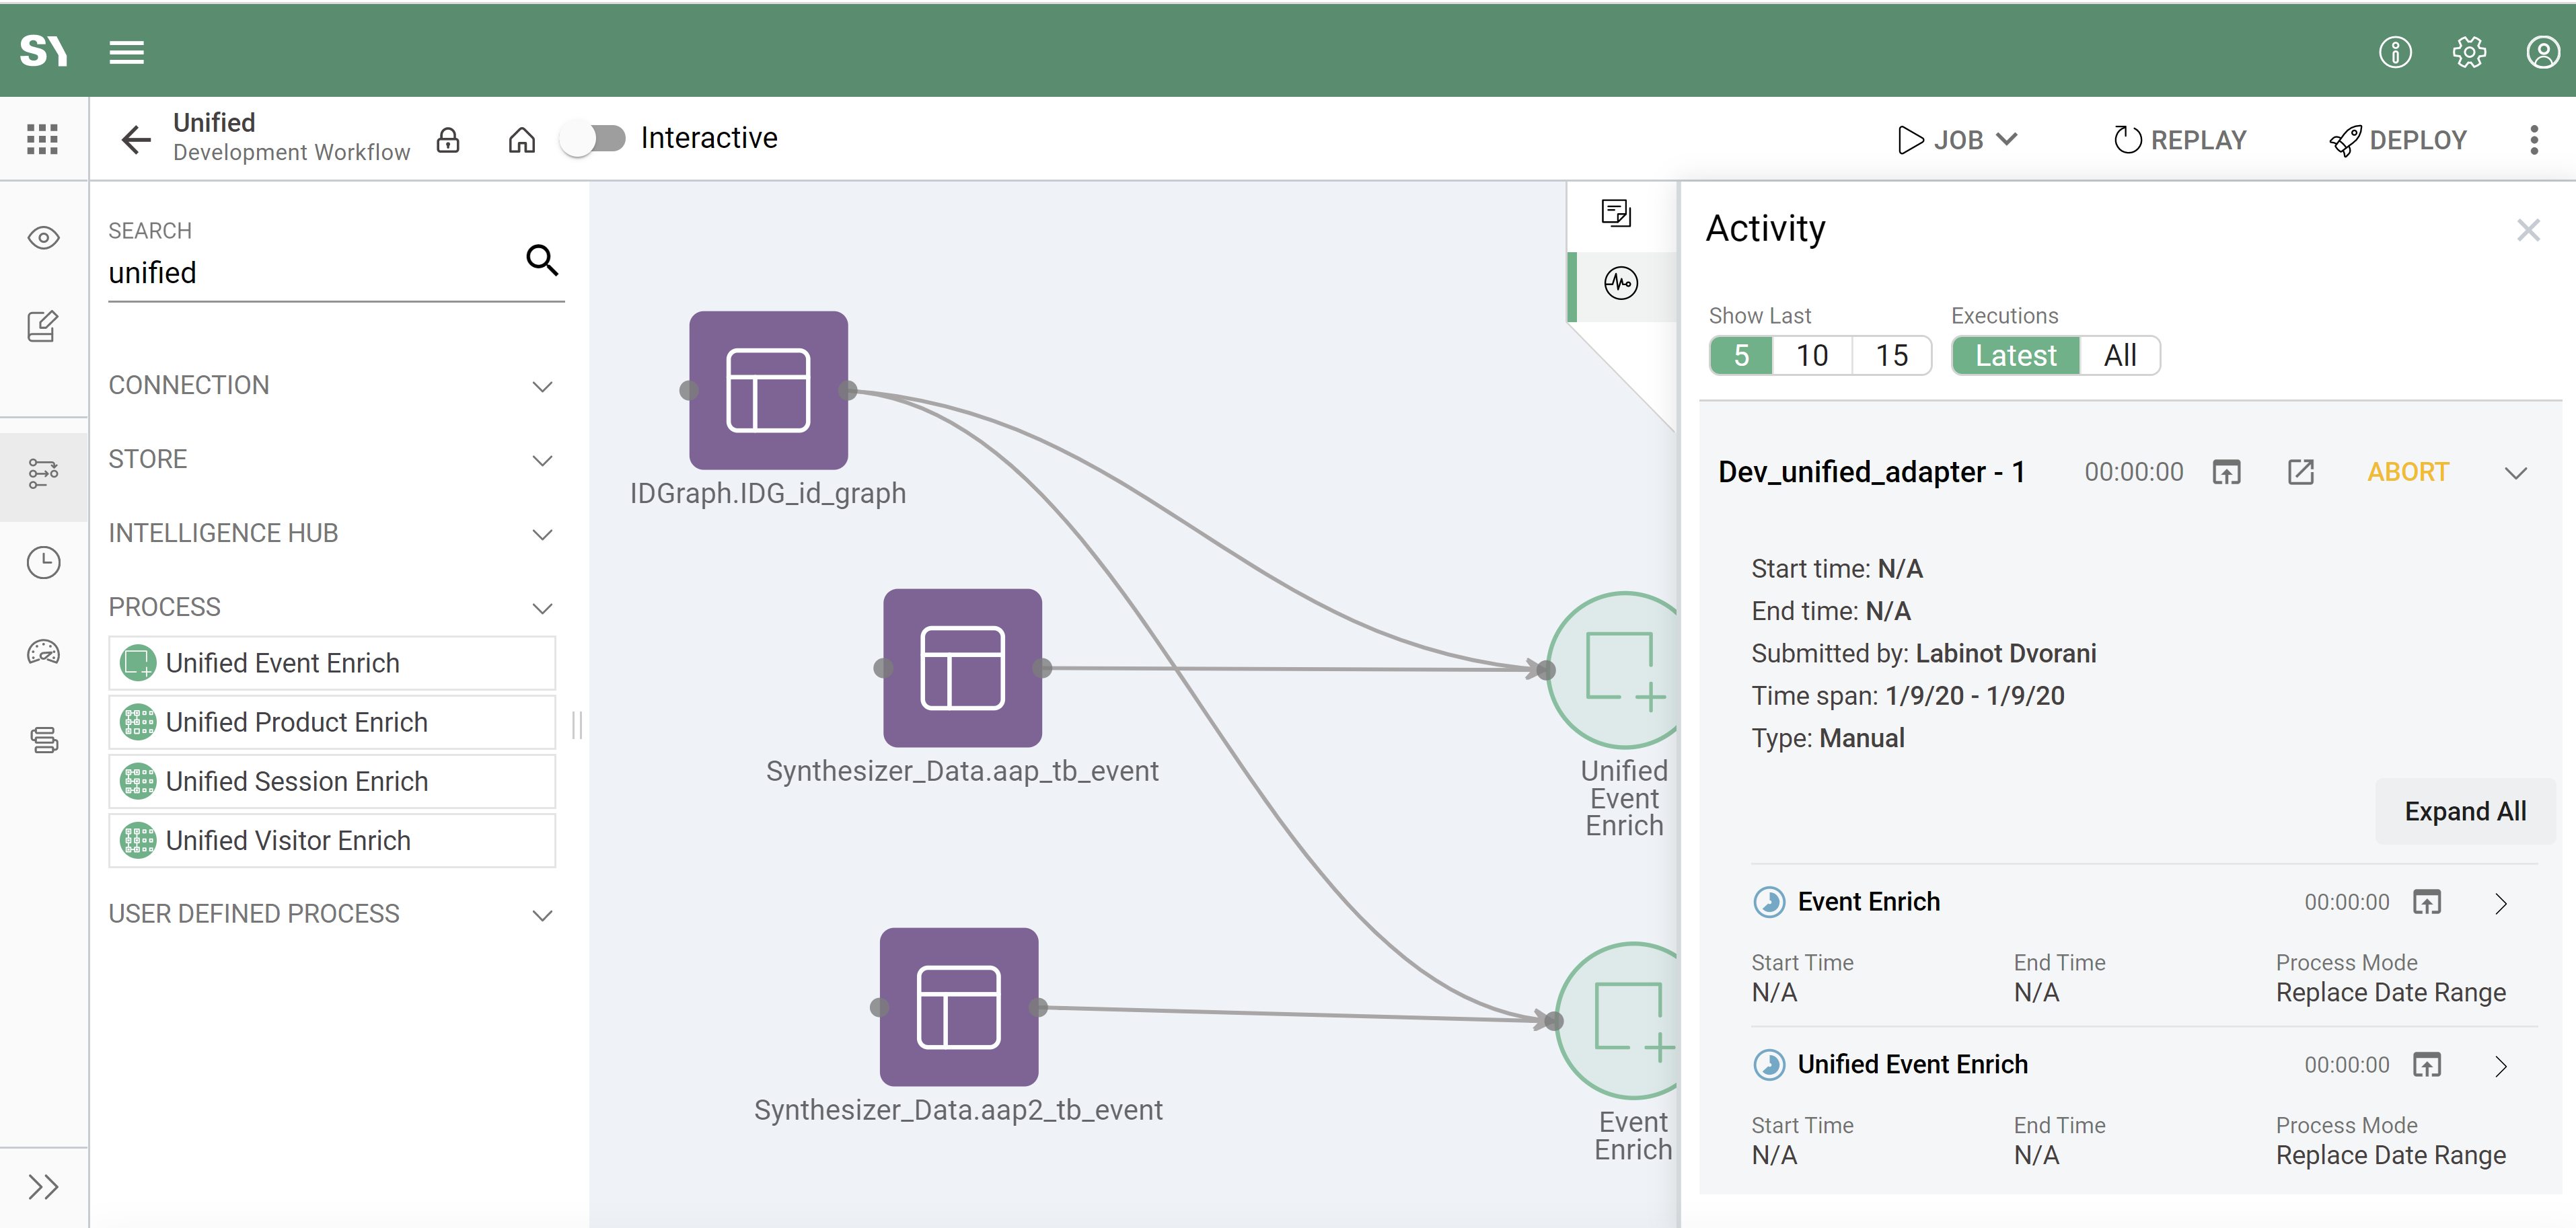
- The panel on the right will have a 1 next to the Activity icon (
 ) indicating one running job. Click on Activity to expand and show job details on the right side menu:
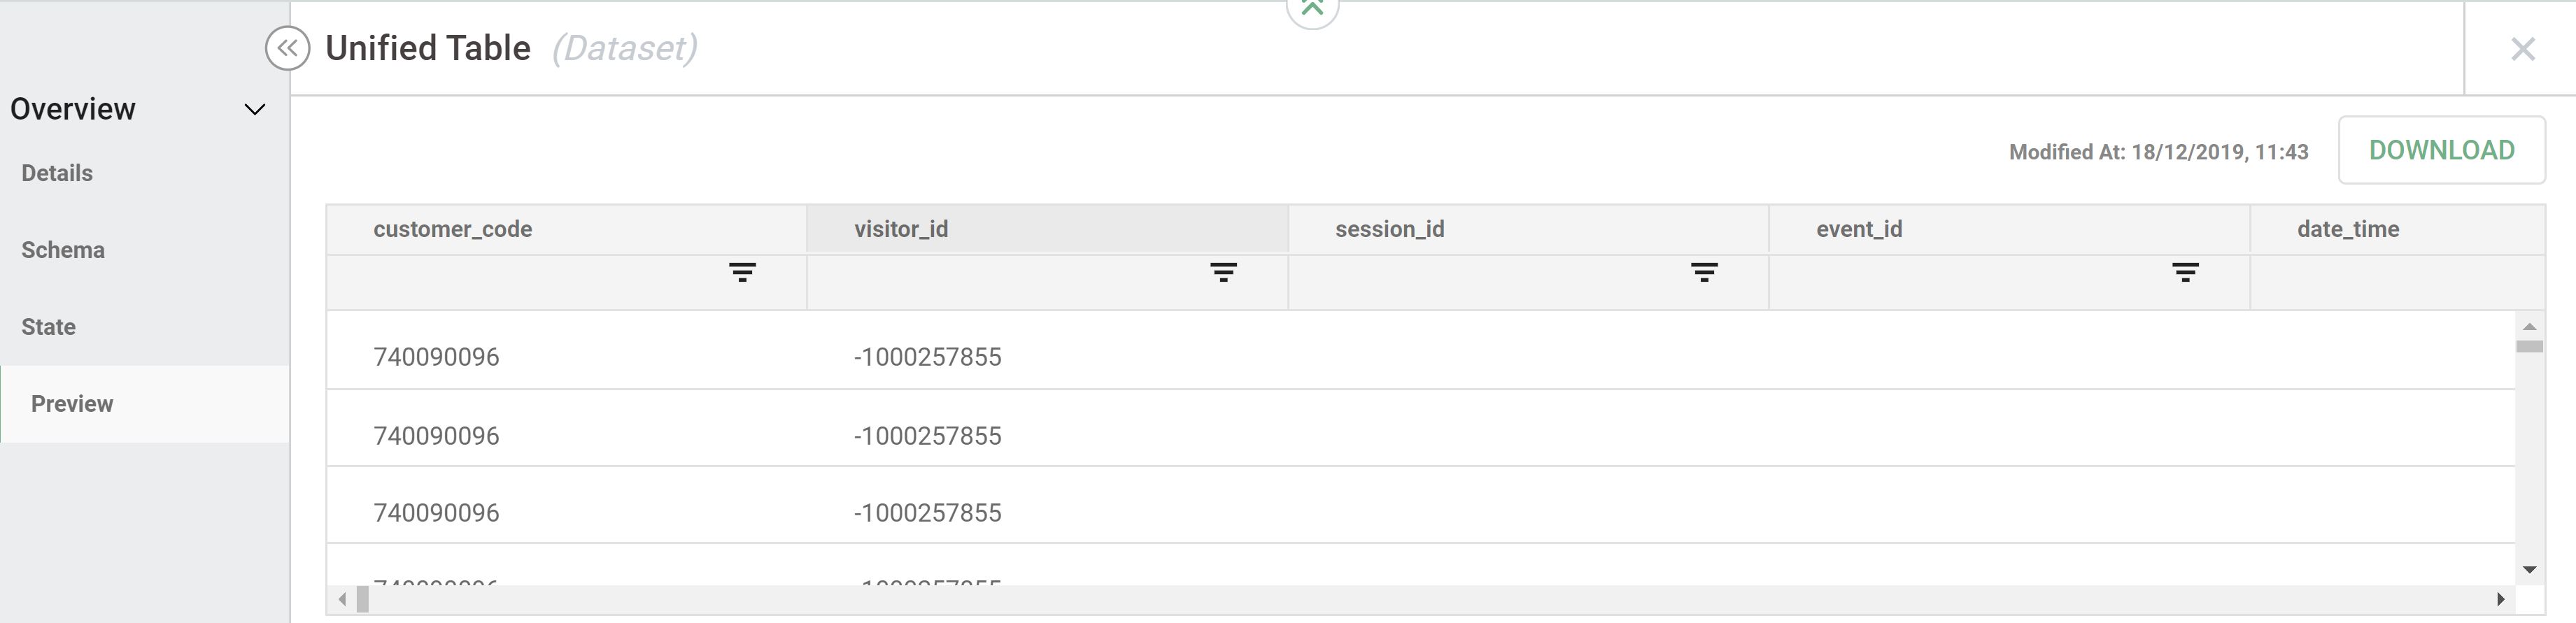
- Once the job completes, you can click on the output node. The panel will have a menu on the left. Click on "Preview":
Run job in production
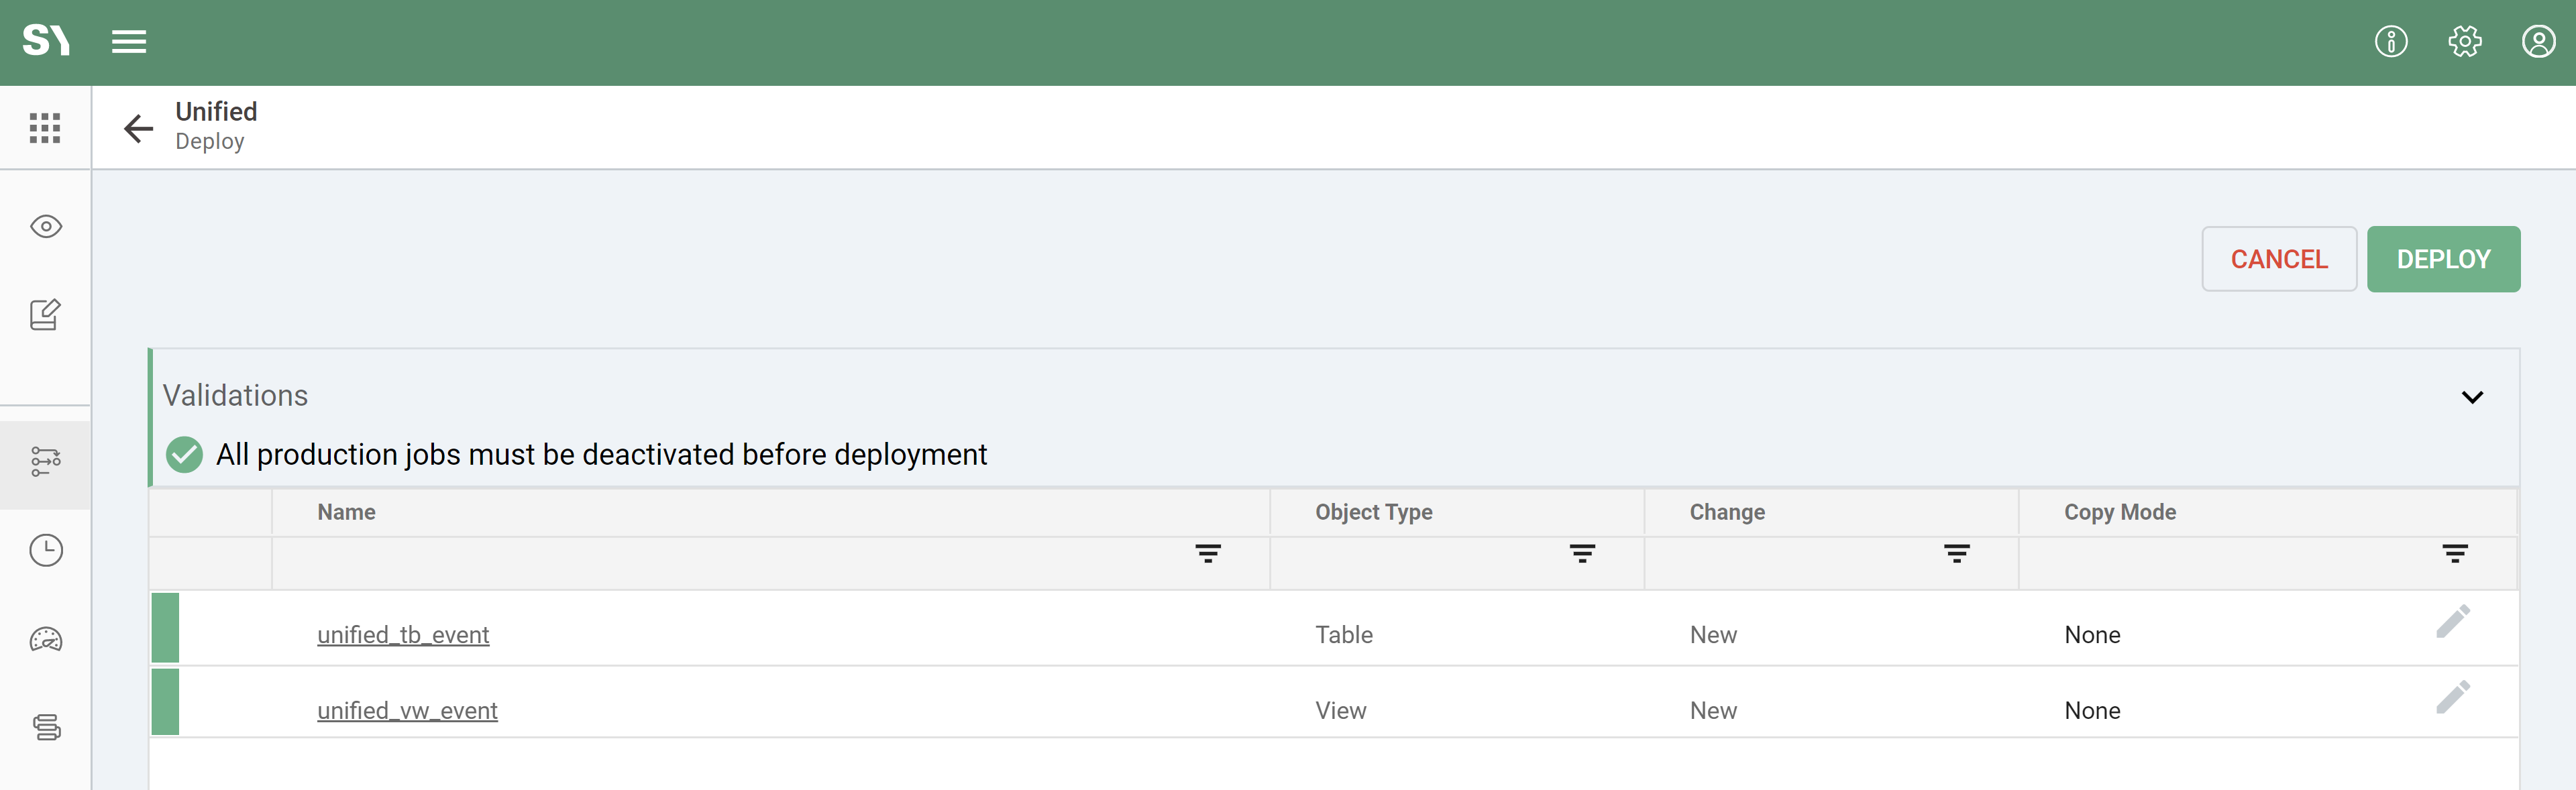
Now it is time to deploy your app from the development workflow to production:
- From the development workflow, click the "Deploy" button:
- After the initial deployment, you will be required to create a snapshot name.
- Snapshot is a feature that saves the state of the app so you can track changes over time and potentially restore a previous version of the app.
- Now open the production workflow.
- Highlight the nodes you want to include in the job by holding "Shift" then clicking on the Unified Event Enrich processes.
- Click on the Job button on the top-right menu; choose "New Job" in the sub-menu; fill in the name, description and date range; click "Save and Execute", which will start the job.
- The panel on the right will have a 1 next to the Activity icon () indicating one running job. Click on Activity to expand and show job details on the right side menu.
- Once the job completes, you can click on the output node. The panel will have a menu on the left. Click on "Preview".