Adobe provides the ability for customers to upload signals that can be used to define traits in Audience Manager (AAM) through their onboarding process. The traits will then be made available to build segments that can be sent to destinations such as Demand Side Platforms (DSP) and shared with Adobe Target. This article serves to provide an understanding of the process from AAM preparation to Syntasa configuration using the "To File" process and evaluating the success of the onboard process.
Acronyms
- AAM - Adobe Audience Manager
- DSP - Demand Side Platform
Pre-Requisites
Before getting started with the Syntasa configuration, AAM should first be configured to accept the data as some of the information will be required when setting up the Syntasa processes.
AAM Configurations
- Signals - Decide on a structure to send the signals. Per Adobe, "Signals are the smallest unit of information within Audience Manager," and "represent user interactions or user activity". These signals are used to build traits. We typically follow a user-defined key-value pair format that makes it easier to build use in the trait expressions.
- Data Source - Ensure a Data Source is created that accepts "Inbound" data that is able to sync with the IDs being onboarded. The ID we typically use is Experience Cloud ID that usually can be found in the clickstream data as "mcvisid". Jot down the Data Source ID, it will be needed when setting up the AAM onboard app in Syntasa.
- Traits - Ensure trait definitions have been created before attempting to send signals. Please note, if you start sending signals before you have defined a trait with respective signals, you may lose the ability to use that onboarded data until a trait has been created. Given we typically use custom defined key-value pairs the trait expressions would simply use the relevant key and any associated value you'd like to be used for this trait. We suggest using one onboarded key-value pair per trait and combining traits when building segments. It provides for more flexibility when building segments.
- Segments - To have the ability to activate the onboarded data Segments need to be built but do not need to be built before beginning the onboarding process. After building segments they will very quickly be made available to share with Adobe Target and with defined Destinations.
- Destinations - Activation of onboarded data is provided by way of Destinations that are usually a 3rd party system such as a DSP.
Data Processed By Syntasa
- Adobe Analytics Input Adapter - Syntasa app that processes Adobe clickstream data providing the ability to derive behaviors and tie them to an ID that facilitates syncing with AAM.
- Derived User Attributes - Syntasa data analysis app that provides curated user attributes and links the attributes to the respective cookie and/or user IDs available in the clickstream data.
Adobe Audience Manager App Creation
- Click on the menu icon (
 ) and under Apps select "Orchestrator" from the sub-menu.
 - Create a new app by clicking on the green and white plus sign (
 ) on the far right of the screen.
 - A new "New App" modal will appear:
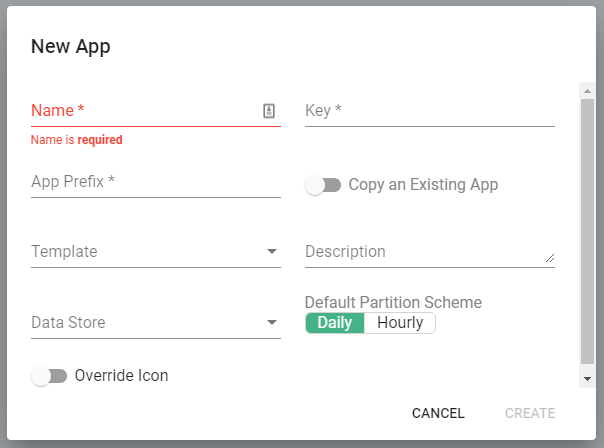
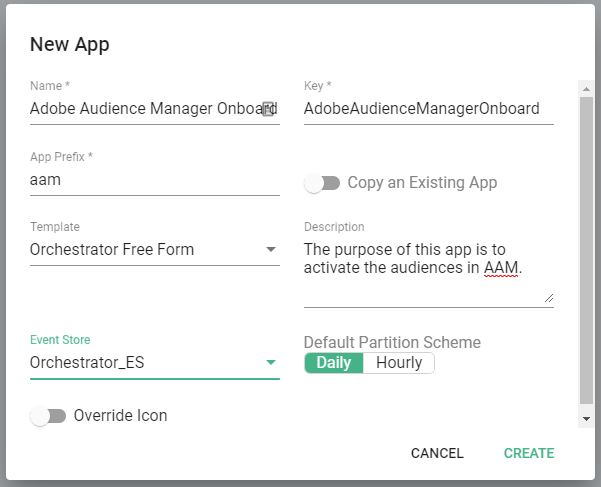
- Fill in the fields:
- Name - Descriptive, concise, and unique name of the app, e.g. Adobe Audience Manager Onboard.
- Key - This typically will auto-populate and is good to leave as-is.
- App Prefix - Provides a short string of text that will make it easy for the users to discern database tables, e.g. aam.
- Template - Select "Orchestrator Free Form".
- Description (Optional) - Provide a lengthier detailed description of the purpose of the app.
- Data Store - Select a relevant Data Store you'd like the data written. Our best practice is to create an "Orchestrator Event Store" that is used for all Orchestrator apps.
- Default Partition Scheme - Select "Daily".
- Override Icon (Optional) - Toggle if you would like to upload your own image to display on the app tiles screen.
- Click the green "Create" button:
- The app will appear on the app tiles screen:

Configure Adobe Audience Manager App
For Orchestrator apps such as the AAM app, the source data will typically come from a Syntasa Event Store with previously prepared data. There are multiple methods of setting up the Orchestrator app in preparation to send the data to Adobe. Some scenarios may include combining and transforming the data from multiple Event Stores in a Transform process or applying a custom query that does further data manipulation in a Code Process.
The focus of this article will the preparation of the "To File" process data will be taken directly from an Event Store table into the "To File" process.
Configure the To File Process
- Unlock the app canvas by clicking the unlock icon (
 ).
). - From the left side menu, under Stores drag an Event Store (
 ) on to the workflow canvas.
 - Left-click the "Event Store" icon.
- Select the relevant "Eventstore" and "Dataset" from the drop-down menus:
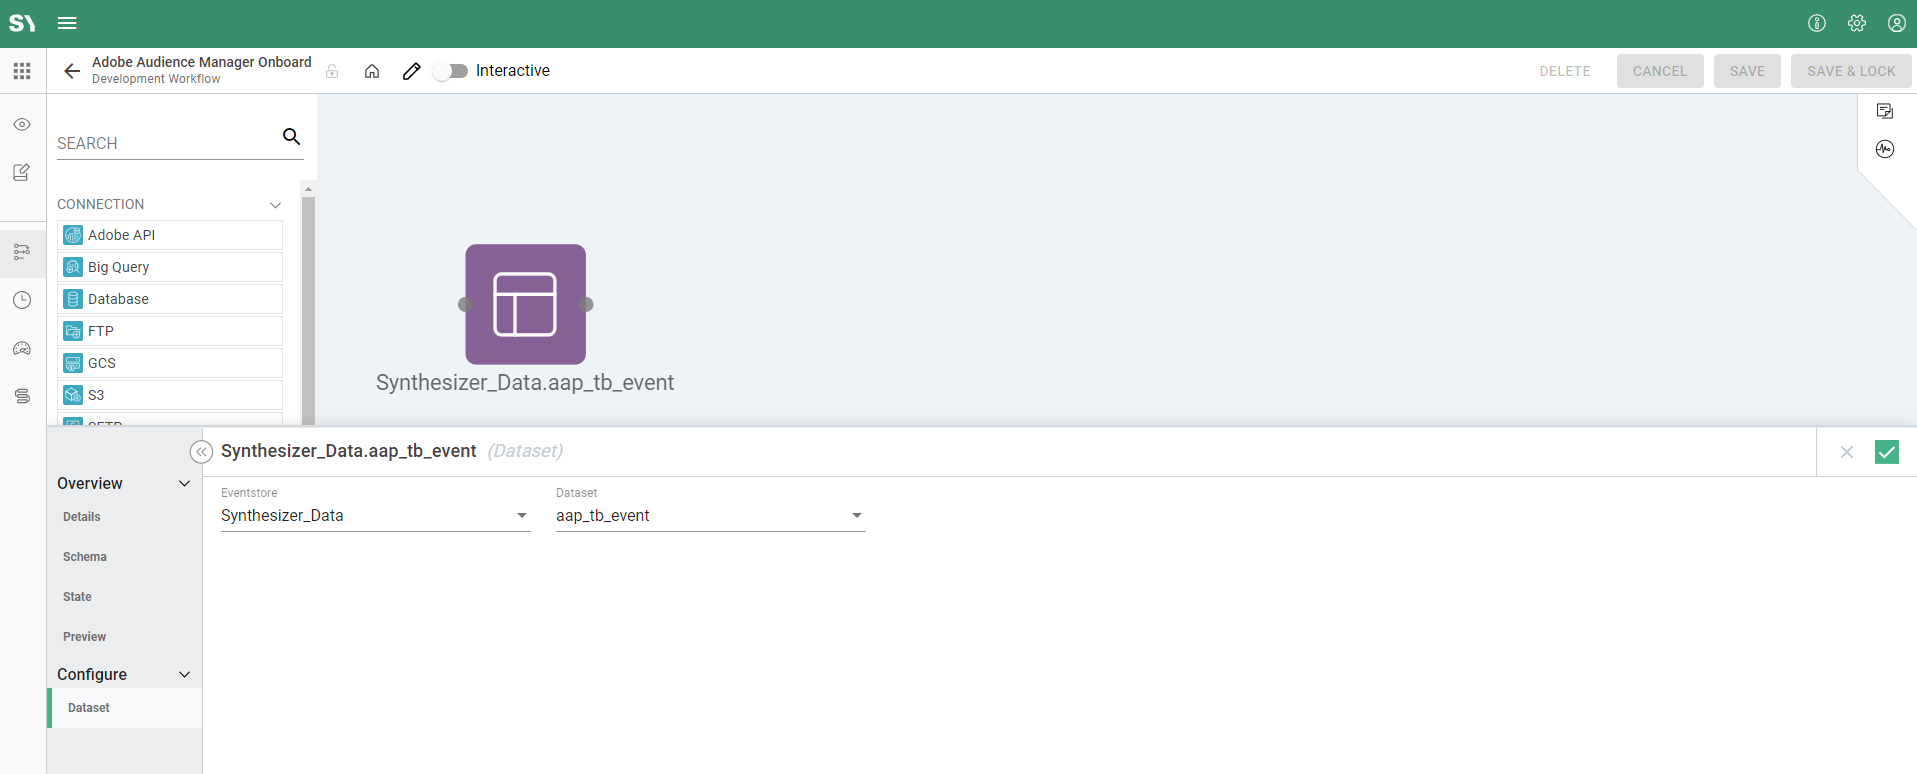
- Click the green checkbox to the right to accept settings and close the configuration window.
- Drag the "To File" process on to the app canvas to the right of the event store.
- Click the black dot on the right side of the event store icon and drag the arrow to connect to the left side of the "To File" process, and the "To File" process should turn white signifying the process can be configured:
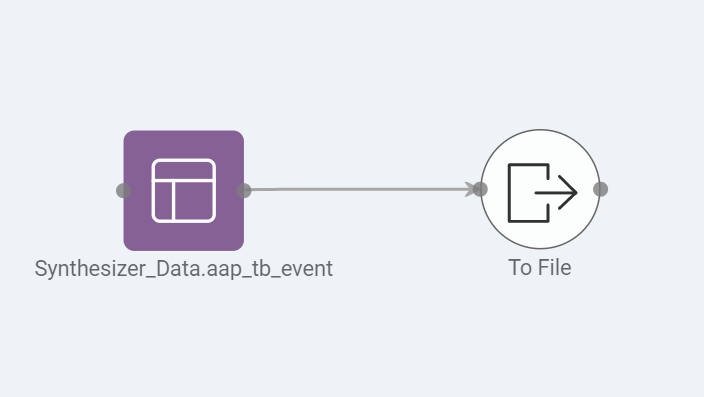
- Left-click the "To File" process.
- A configuration window will appear from the bottom:
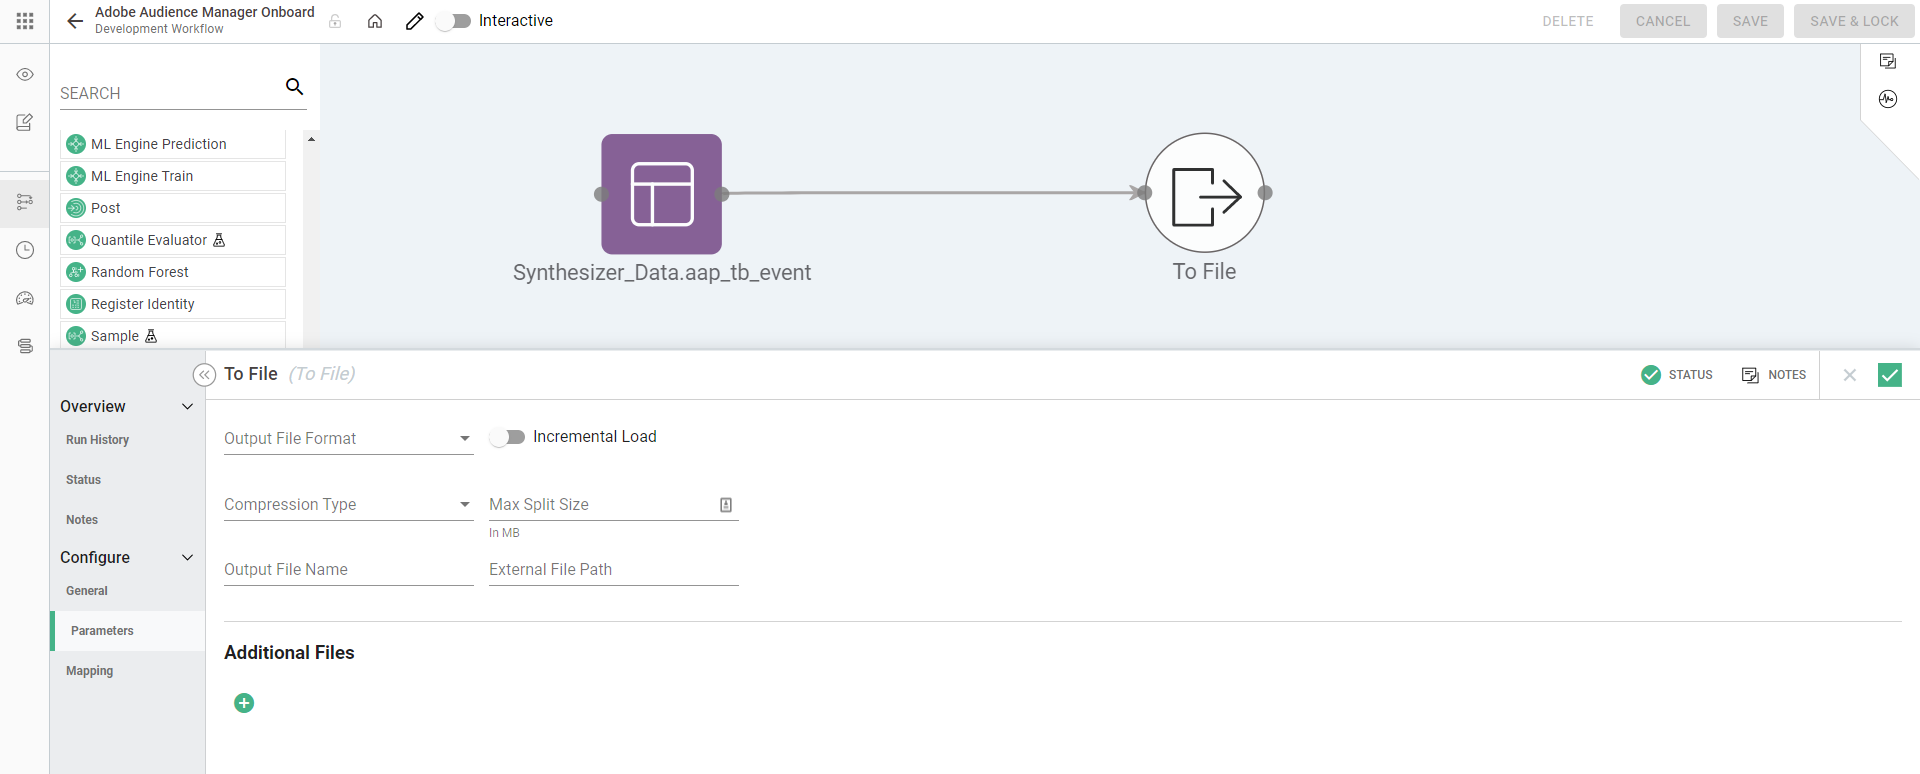
- Configure the process, starting with Parameters.
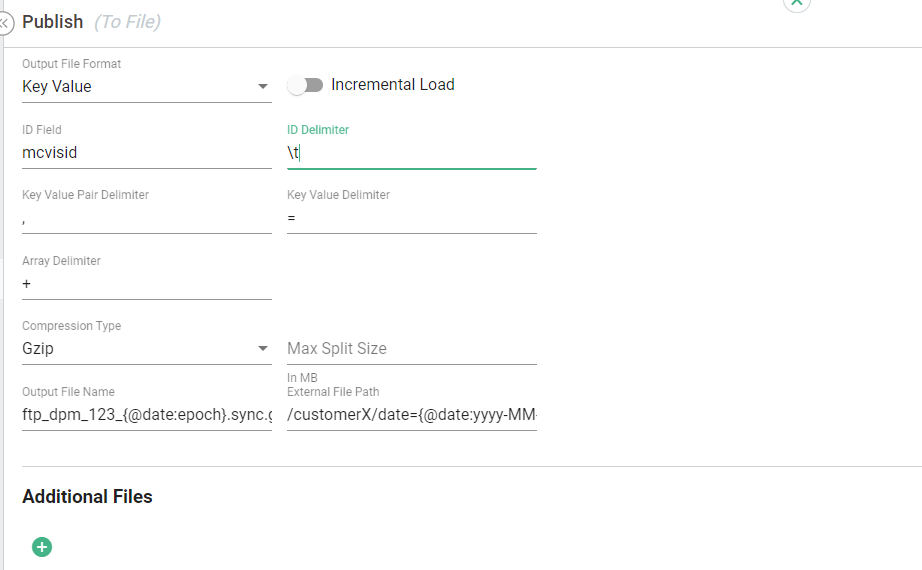
- The following are configuration settings to structure and name a file in a manner that Adobe will accept when using S3:
- Output File Format: Key Value
- Incremental Load: toggled off
- ID Field: mcvisid
- ID Delimiter: \t
- Key Value Pair Delimiter: ,
- Key Value Delimiter: =
- Array Delimiter: +
- Compression Type: Gzip
- Max Split Size: leave blank
- Output File Name: ftp_dpm_<Date Source ID>_{@date:epoch}.overwrite where <Data Source ID> is the ID captured from the Data Source creation in AAM. Please note, Adobe does provide the ability to sync or overwrite the data. Please consult Adobe documentation for a better understanding of the configuration that may serve your needs best.
- External File Path: /<customer name>/date={@date:yyyy-MM-dd} where <customer_name> is typically your company name, but Adobe should be able to provide this to you. The @ parameters are Syntasa system parameters to enable adding dynamic information. In the above two cases, Adobe requires a current epoch time and current date to be used when creating the file and the folder to place the file. These two parameters should be left as-is and should not require any further customization.
- Click the green check mark to accept configuration settings.
- Click the Save button (
 ) to ensure configurations are committed.
 - Left-click to re-enter and continue configuring the "To File" process.
- Click the "Mapping" option.
- Unlock the app canvas by clicking the unlock icon ().
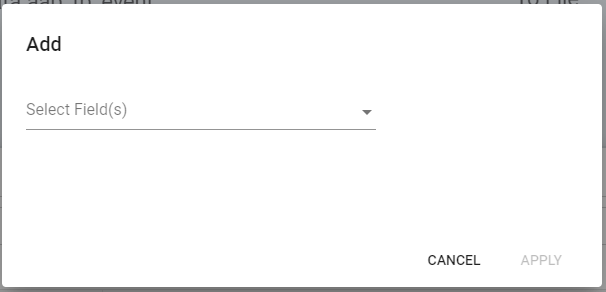
- Click the "+ Add" button (
 ) to add the fields to be included in the file delivered to Adobe.
 - An "Add" window should appear:
- Select the relevant fields, starting with the ID, i.e. mcvisid, and then the attributes that should be sent to Adobe:
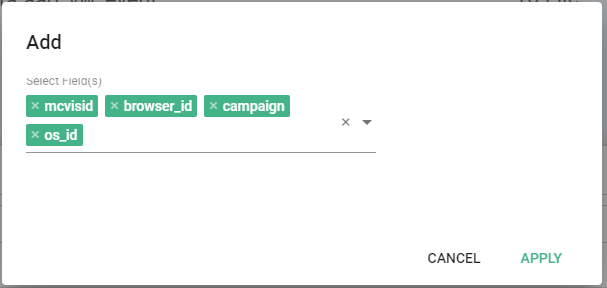
- Click the green "APPLY" button and the selected fields will appear in the Mapping screen:
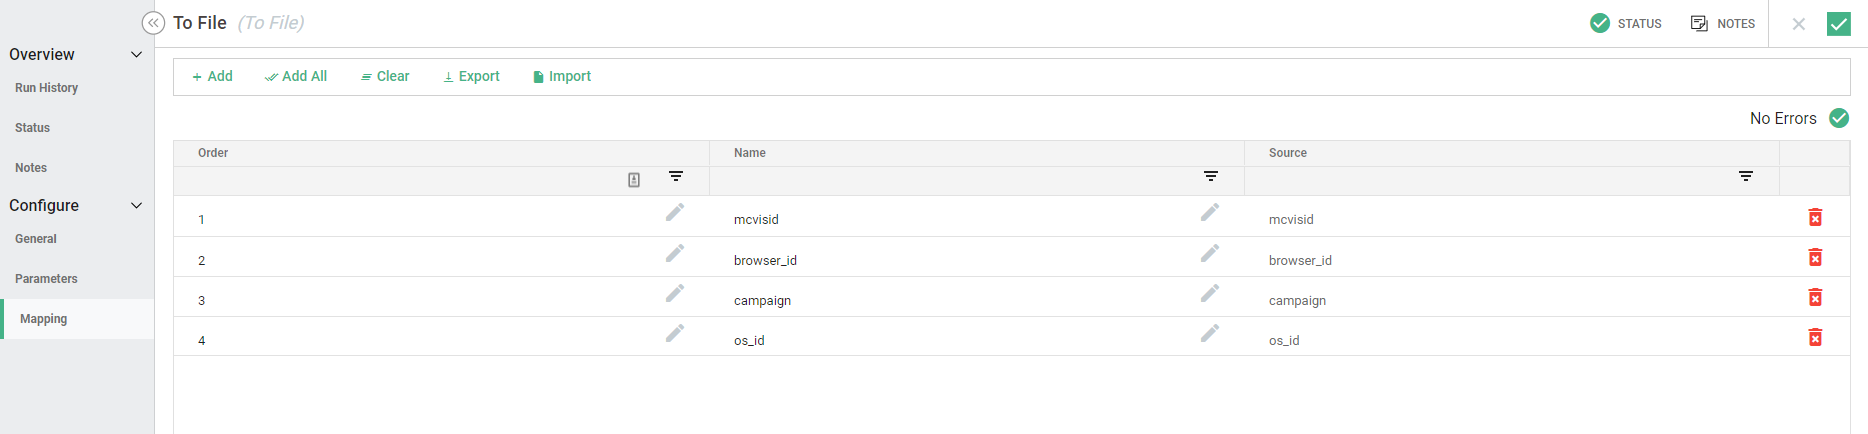
- The "Name" column will be the "Key" of your key=value pair to be sent to Adobe and the data within the respective Name field will be the values. To modify the "Name" double-click the field and type in the name you desire.
- Click the "General" option of the "Configure" menu.
- Change the "Process Name" to "AAM Onboard":

- Click the green checkmark to accept configurations.
- Click the "Save & Lock" button (
 ) to ensure configurations are committed.
Add a Connection
For the "To File" process to work a Connection needs to be dragged on to the workflow canvas and connected. For this article we are sending data to S3, please refer to Connections for information about creating a new connection, if needed.
- Drag an S3 connection (
 ) on to the workflow canvas.
 - Left-click the S3 connection.
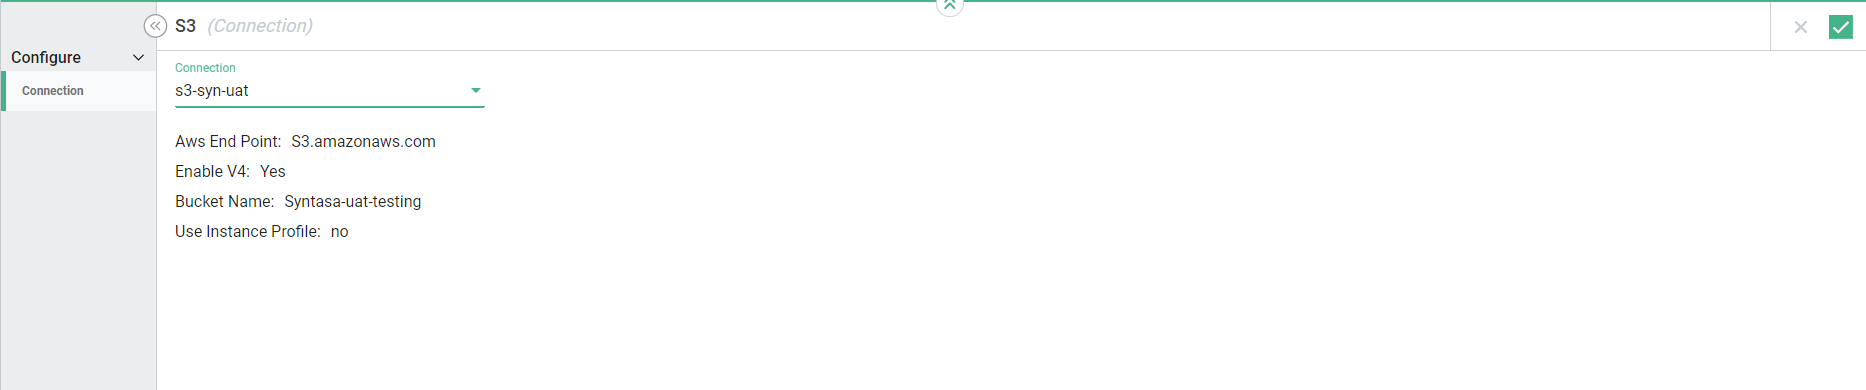
- Select the respective Connection from the drop-down (example below):
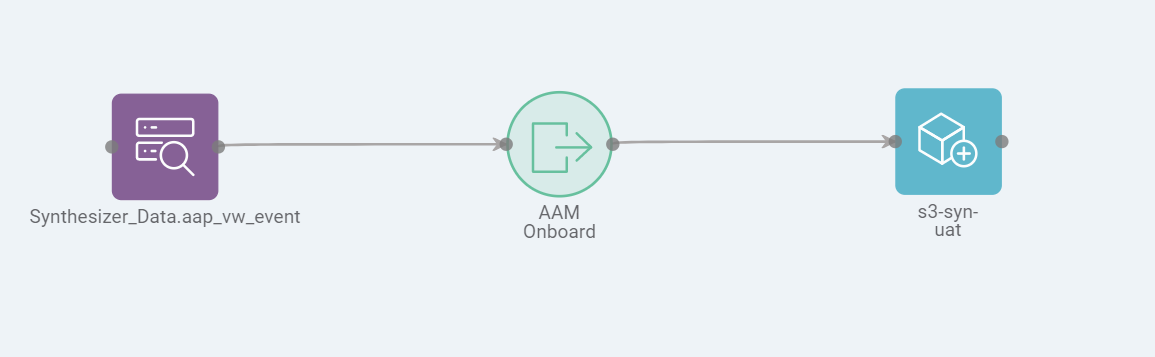
- Connect the "AAM Onboard" to the defined connection:
- Click the "Save & Lock" button () to ensure configurations are committed.
SYNTASA Development & Production Concept
The SYNTASA application has the concept of development workflow and production workflow. Changes are only made in the development workflow. Once changes are tested and validated, the workflow can then be deployed to production. From there, a production job can be configured, executed and scheduled (scheduling includes triggering (App/Process/Time).
Test in Development
Now you're ready to test your configuration:
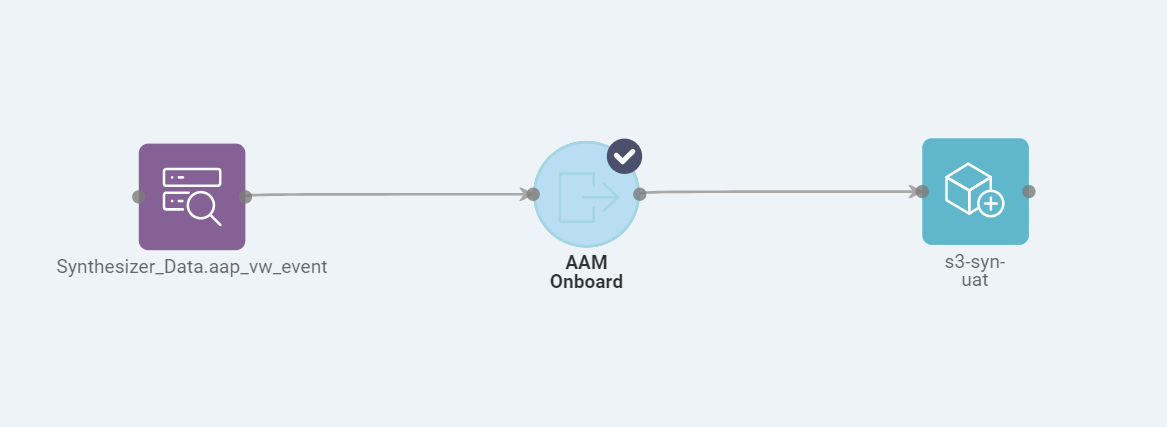
- Click on the "AAM Onboard" node while holding the shift key. The node will be highlighted in grey with a tick (see the below screenshot) to indicate it's been selected:
- Click on the"Job" button (
 ) on the top-right.
 - Click "Create New +" (
 ) from the drop-down.
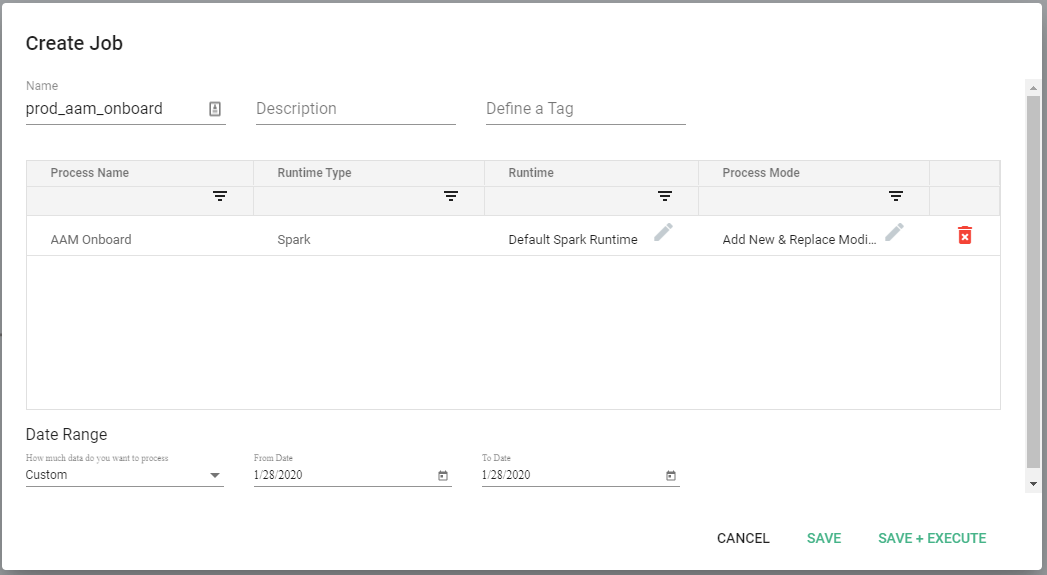
 - A "Create Job" window will appear:
- Name - Descriptive name of the job to facilitate searching for job logs for troubleshooting.
- Description (optional) - Detailed description of the purpose of the job.
- Define a Tag (optional) - Custom free text field to help segment jobs in the job logs.
- Process name - Auto-populated, not editable.
- Runtime Type - Auto-populated, not editable.
- Runtime - Drop-down to choose the type/size of the cluster necessary for processing.
- Process Mode - In Development workflow use "Replace Date Range" for most cases and "Drop and Replace" when table structure is modified.
- Date Range - In Development workflow use "Custom" and select the "From Date" and "To Date".
- Advanced - Use the default settings.
- Click "Save & Execute" (
 ) to start the job.
 - Click the "Activity" icon (
 ) to expand and show job details on the right side menu:
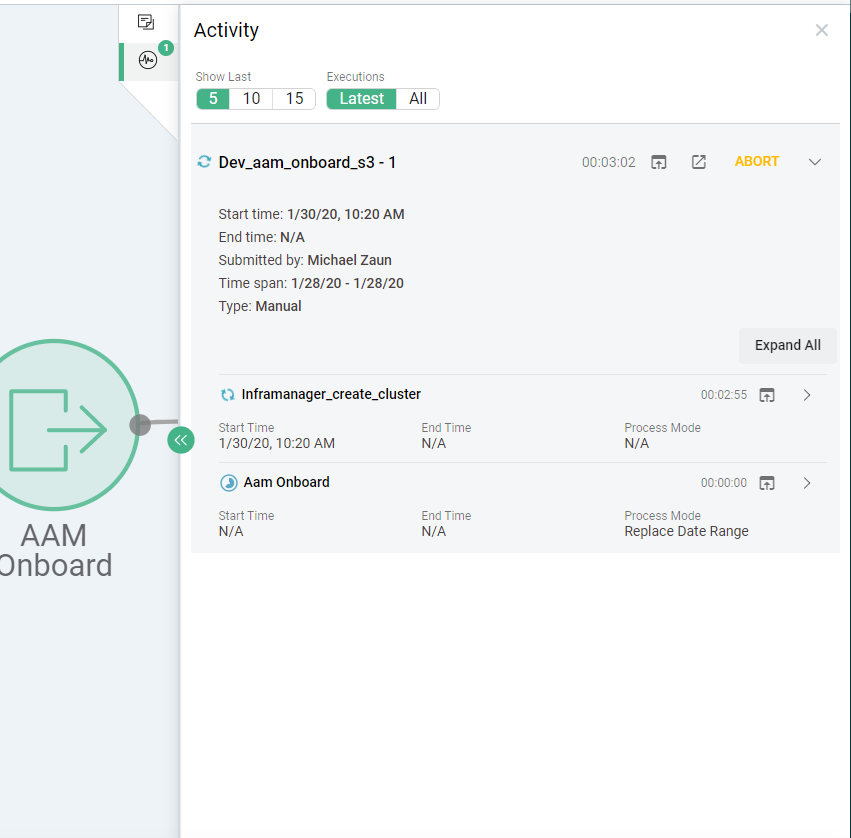
- When the job completes, the "AAM Onboard" process node
 will either be solid green to signify success or red to signify failure.
 - To verify the job successfully delivered the file, check within the S3 bucket for the file.
Run Job in Production
- Initial deploy. From the development workflow, click the "Deploy" button (
 ).
). - A deploy screen should appear. Click the "Deploy" button (
 ).
). - Go to the Production Workflow.
- Hold shift and click on the "AAM Onboard" process.
- Click on the"Job" button () on the top-right.
- Click "Create New +" () from the drop-down:
- Click the "Activity" icon () to expand and show job details on the right side menu:
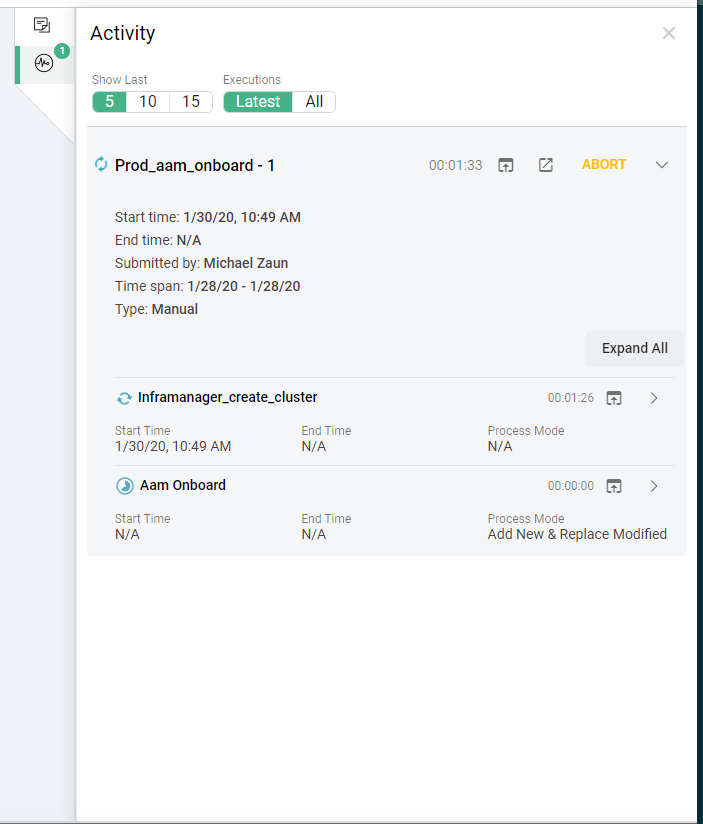
- To verify the job successfully delivered the file, check within the S3 bucket for the file.
Validating Data Gets Processed by Adobe
The files in the S3 bucket will be stamped with ".processed" almost instantaneously. This only means that Adobe recognizes the file has been uploaded, not that the file was actually successfully processed. Through, there are Onboarding Status Reports available in the AAM UI. It is also possible to create email status reports that provide onboarding details when the file has been processed.
Please contact your Adobe representative if you have any questions about AAM configuration and status reporting.