Found within the Security menu, which is where the system administrator creates and manages users, user groups, and the assignment of components to groups, the Group Management screen is dedicated to creating and managing all aspects of user groups.
This article includes an overview of:
- Navigating the Group Management screen
- Adding a new user group
- Editing an existing user group
- Reviewing component access
Navigating the Group Management screen
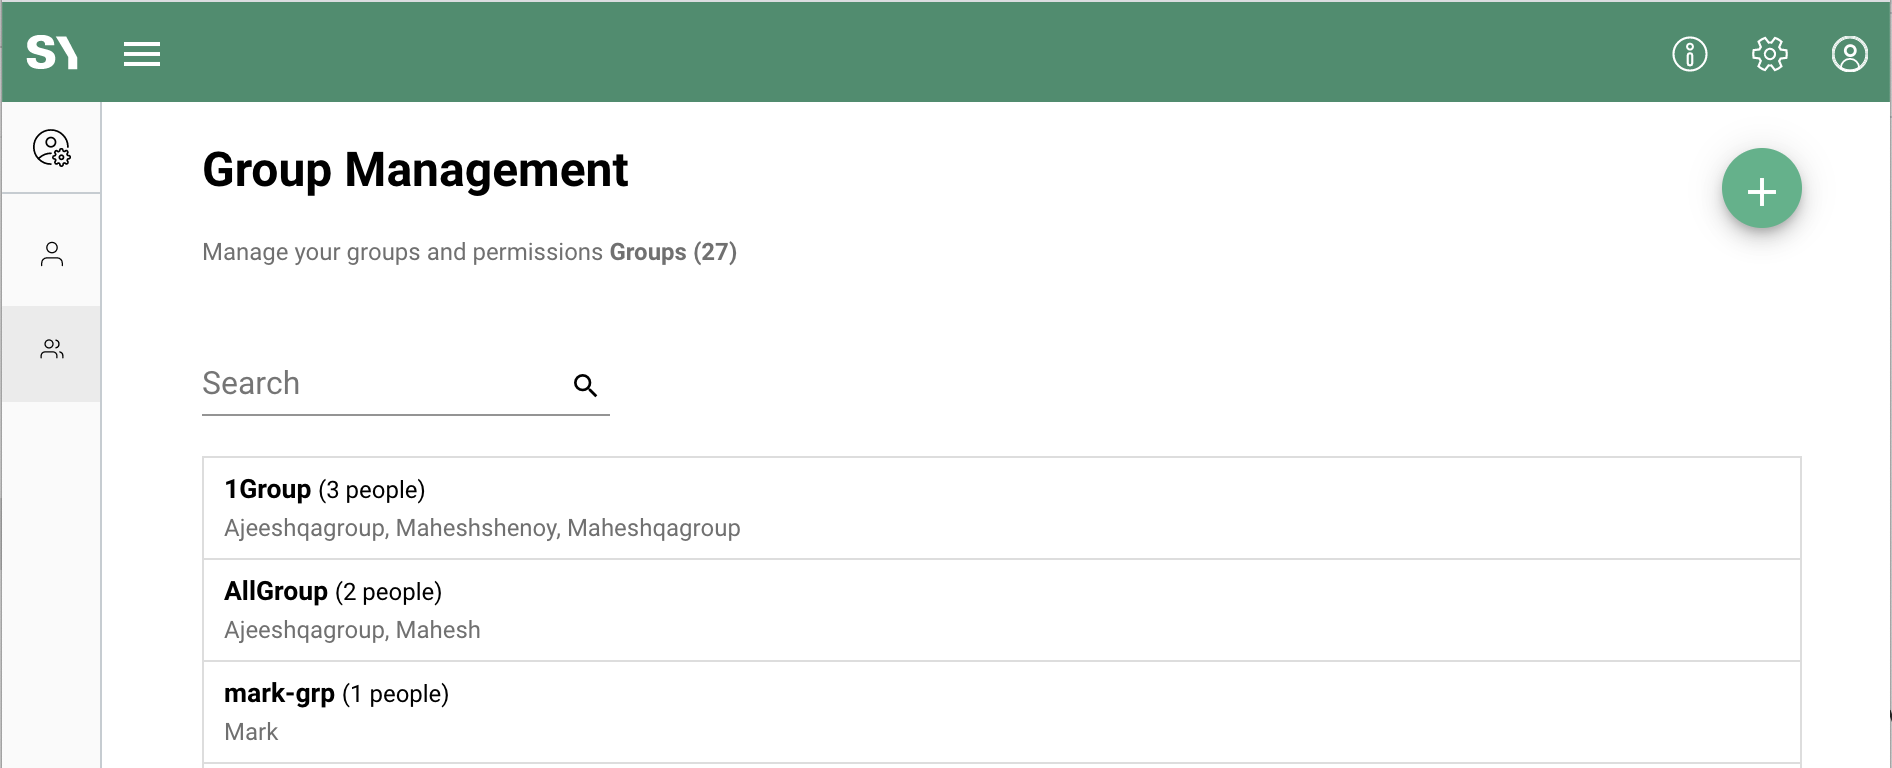
The Group Management screen can be navigated from within Security by clicking on the user group icon (![]() ). Within this screen, user groups can be created, updated, including assigning the users to user groups, and deleted.
). Within this screen, user groups can be created, updated, including assigning the users to user groups, and deleted.
The user group functionality is available in Syntasa 5.2 and forward.

Adding a new user group
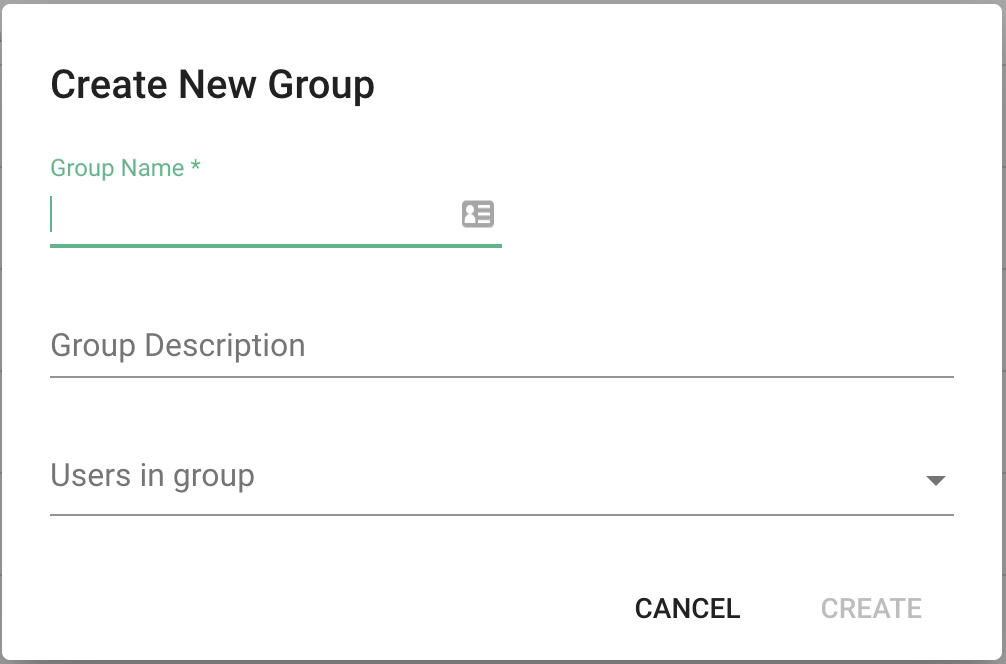
Adding a new user group is performed by clicking the green plus button (![]() ) within the Group Management screen. Clicking this will provide the pop-up seen below to enter the needed values and select the desired users.
) within the Group Management screen. Clicking this will provide the pop-up seen below to enter the needed values and select the desired users.

All fields can be edited after the user group has been created, as detailed in the section below. Also, users can be added or removed from user groups from within the User Management screen.
Editing an existing user group
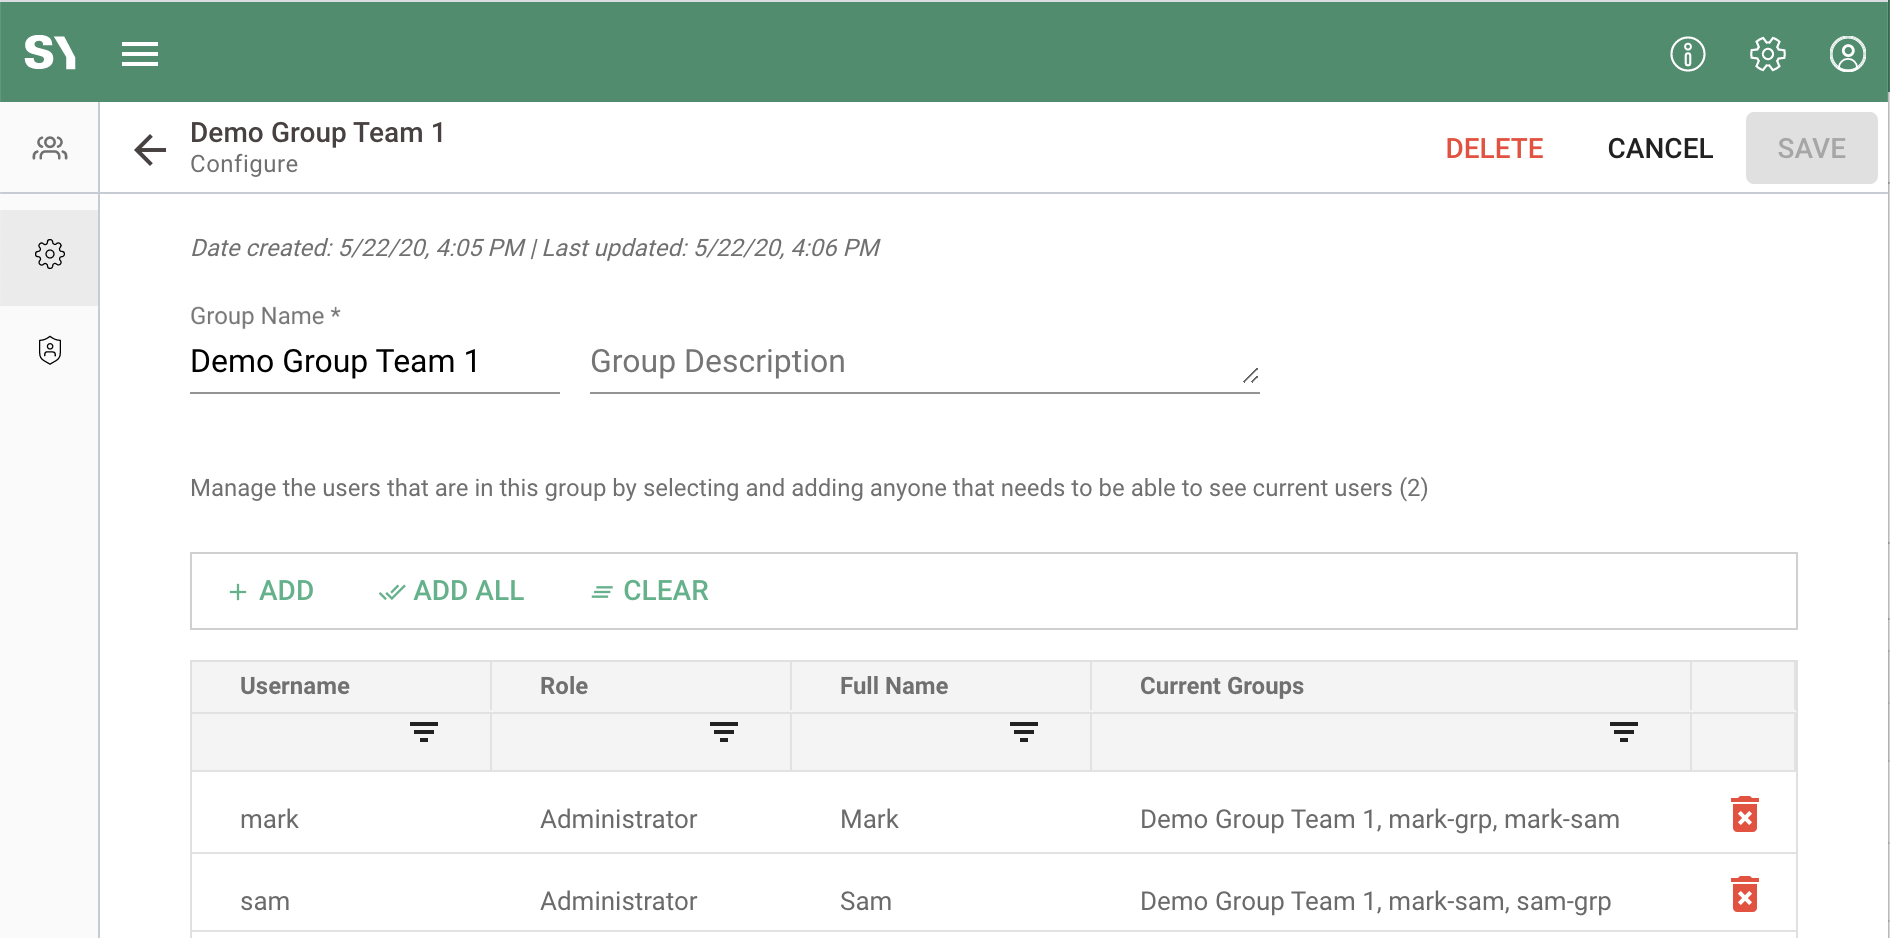
Clicking on the name of an existing user group navigates to the configuration details of the specific user group. The configuration section can also be reached by clicking the configure icon (![]() ) if already within the details of the user group, but in a different section, e.g. the access section of the said user group.
) if already within the details of the user group, but in a different section, e.g. the access section of the said user group.

Within the configuration section of a user group, the system administrator can alter all fields provided at the time of creating the user group as well as alter the users that are assigned.
The user group assignment can be altered here for the user group, i.e. add many users to this user group at the same time, but also individual users can be added to multiple groups at the same time in the User Management screen.
Reviewing component access
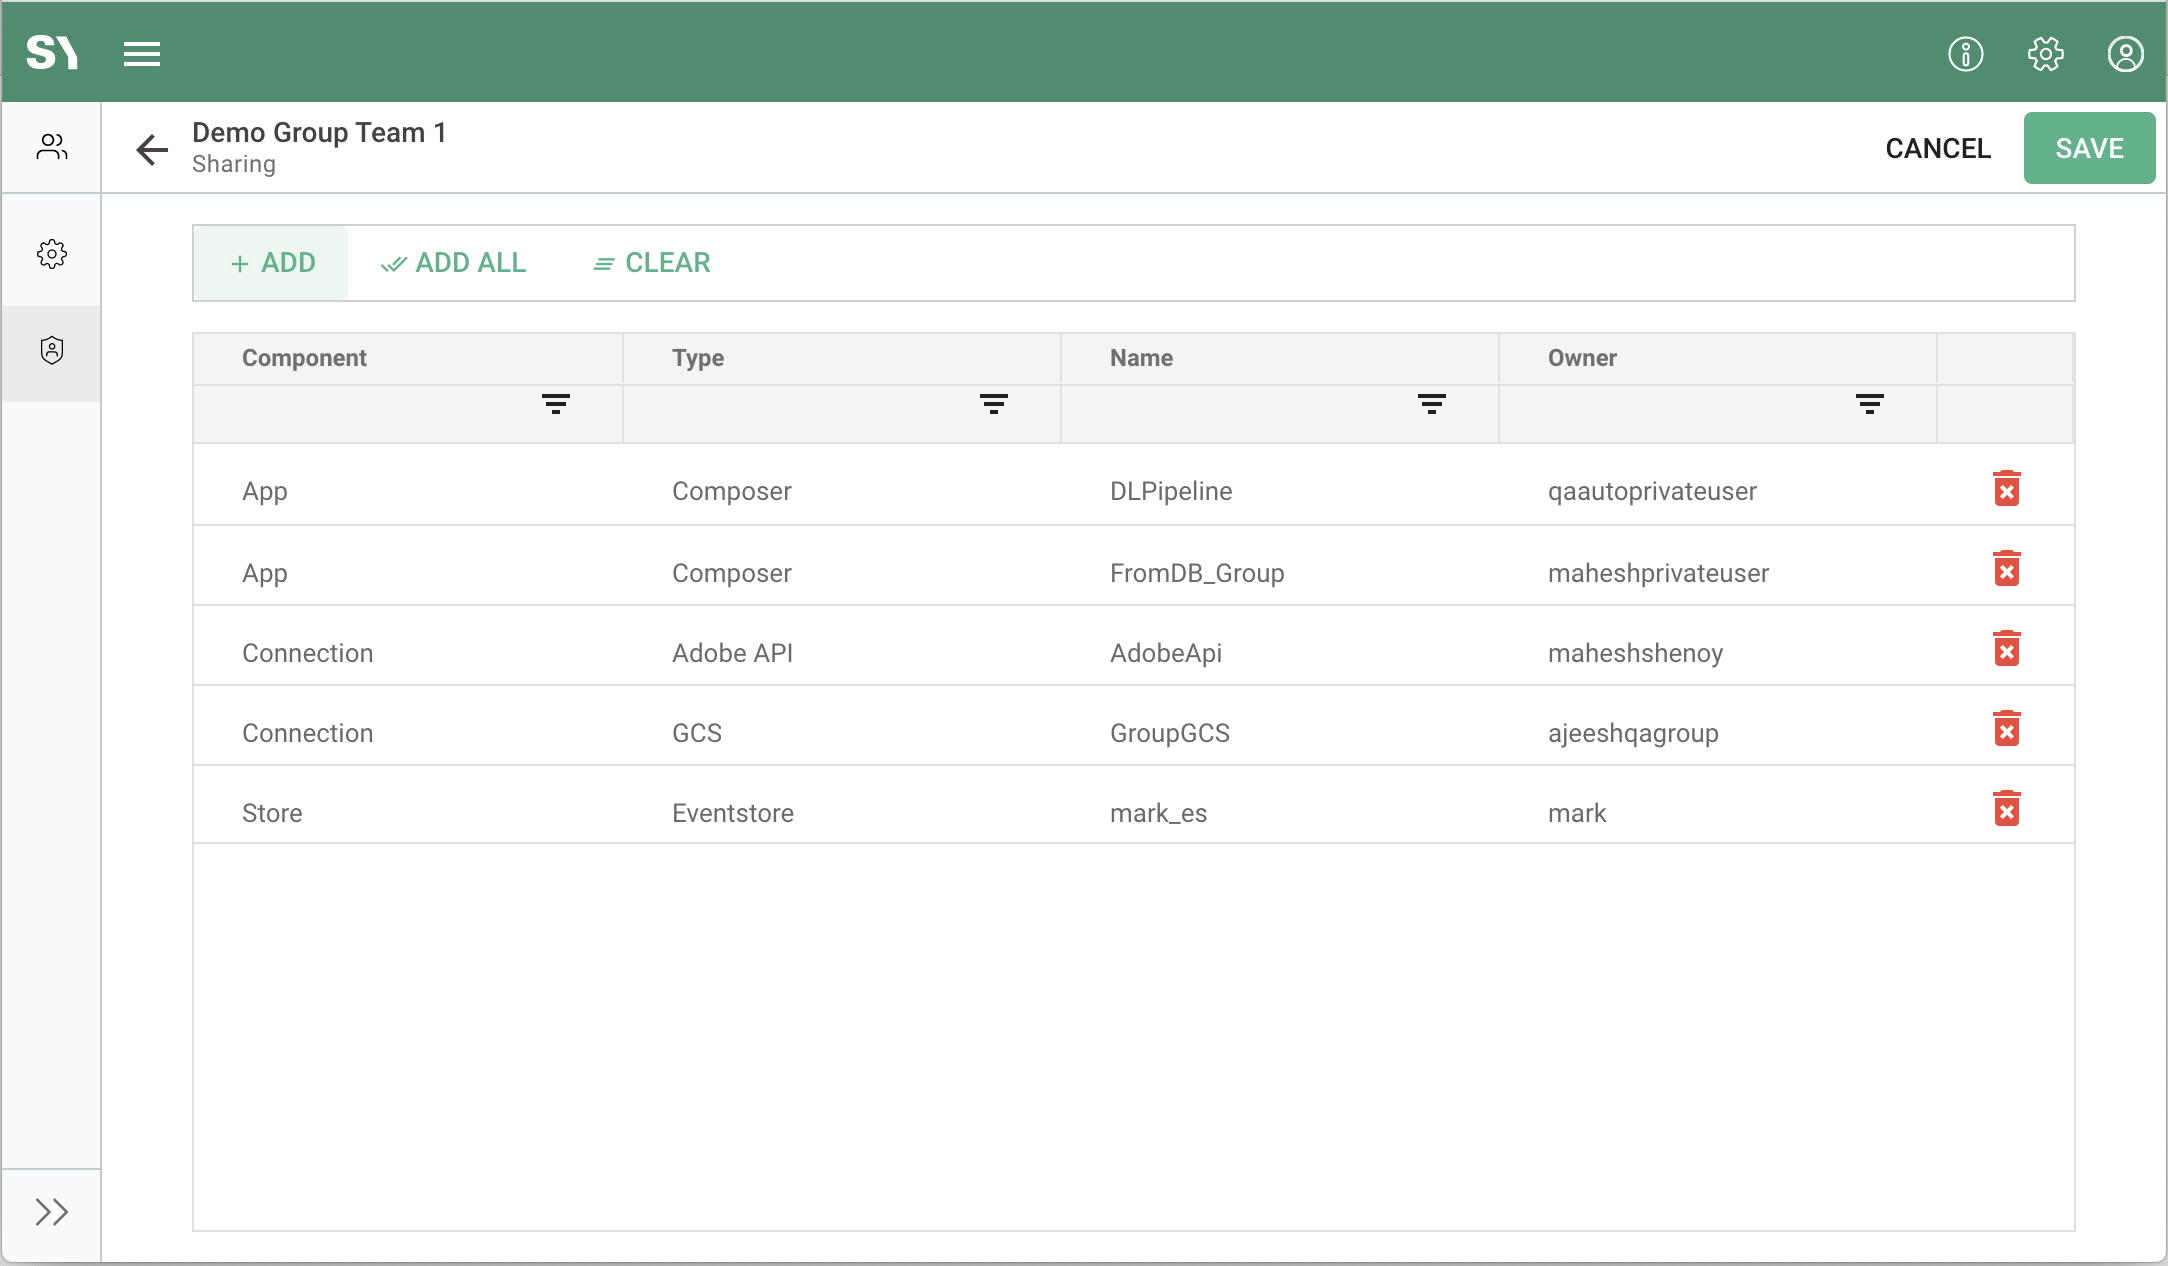
The access section of the user group can be reached by clicking the access icon (![]() ). From here the system administrator can add or remove components from the user group. This view is useful to see all components that are assigned to a single group. From within each component, the owner and system administrator can see all user groups that the component is assigned.
). From here the system administrator can add or remove components from the user group. This view is useful to see all components that are assigned to a single group. From within each component, the owner and system administrator can see all user groups that the component is assigned.

Adding components to a user group
When adding a component the sharing option does need to already be set to the value "Users in groups". Only those components that have been set to such will appear in the available selections when adding to the user group.
The addition of a component to a user group can also be done within the component itself, only by the owner of the component or the system administrator. From within the component, it can also be seen if/what multiple user groups it has been assigned.
Removing components from a user group
When removing a component from a user group there are several validations that are verified to ensure the removal is allowed. An instance of a user group not being allowed to be removed from a component is when the component is shared with a user who is utilizing the component in an app that they are the owner of.
For example, a connection BobConnection has been created by Bob, its sharing option set to the value "Users in groups", and assigned to a group that another user, Jack, is included. Jack then has created an app using the connection BobConnection. If Bob tries to remove the connection from the user group then Jack would no longer have access to it and thus make his app invalid.
This situation will be halted with a validation rule and message and thus not allow Bob to remove the connection from the user group that Jack is assigned to.