Campaign Workflow: Social Proofing
Overview
The Social Proofing campaign workflow allows you to instantly display real-time popularity metrics (e.g., "15 people bought this today") on your Product Listing Pages (PLPs) or Product Detail Pages (PDPs) to accelerate purchase decisions.
This workflow follows a 3-step configuration process. This guide focuses primarily on Step 2, where the specific calculation logic and display thresholds for your social proofing message are defined.
Step 1: Define Campaign (Summary)
Initiate the campaign by defining its metadata and overarching goals.
-
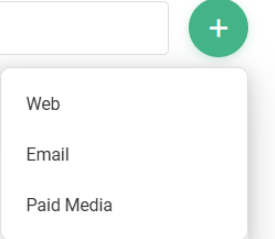
Initiate Workflow: Click + Create New from the All-Campaigns view.
-
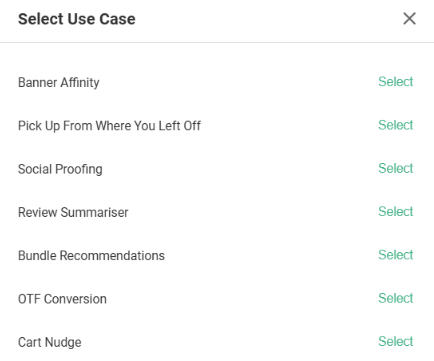
Select Channel & Use Case: Select Web as the channel, and choose the Social Proofing use case from the modal.
-
Metadata: Provide a clear Campaign Name and Description. Default labels (e.g.,
Social Proofing,Web,PLP) will automatically populate. -
Primary Conversion Goal: Select the metric that defines the success of this campaign (e.g., Purchase or Add to Cart).
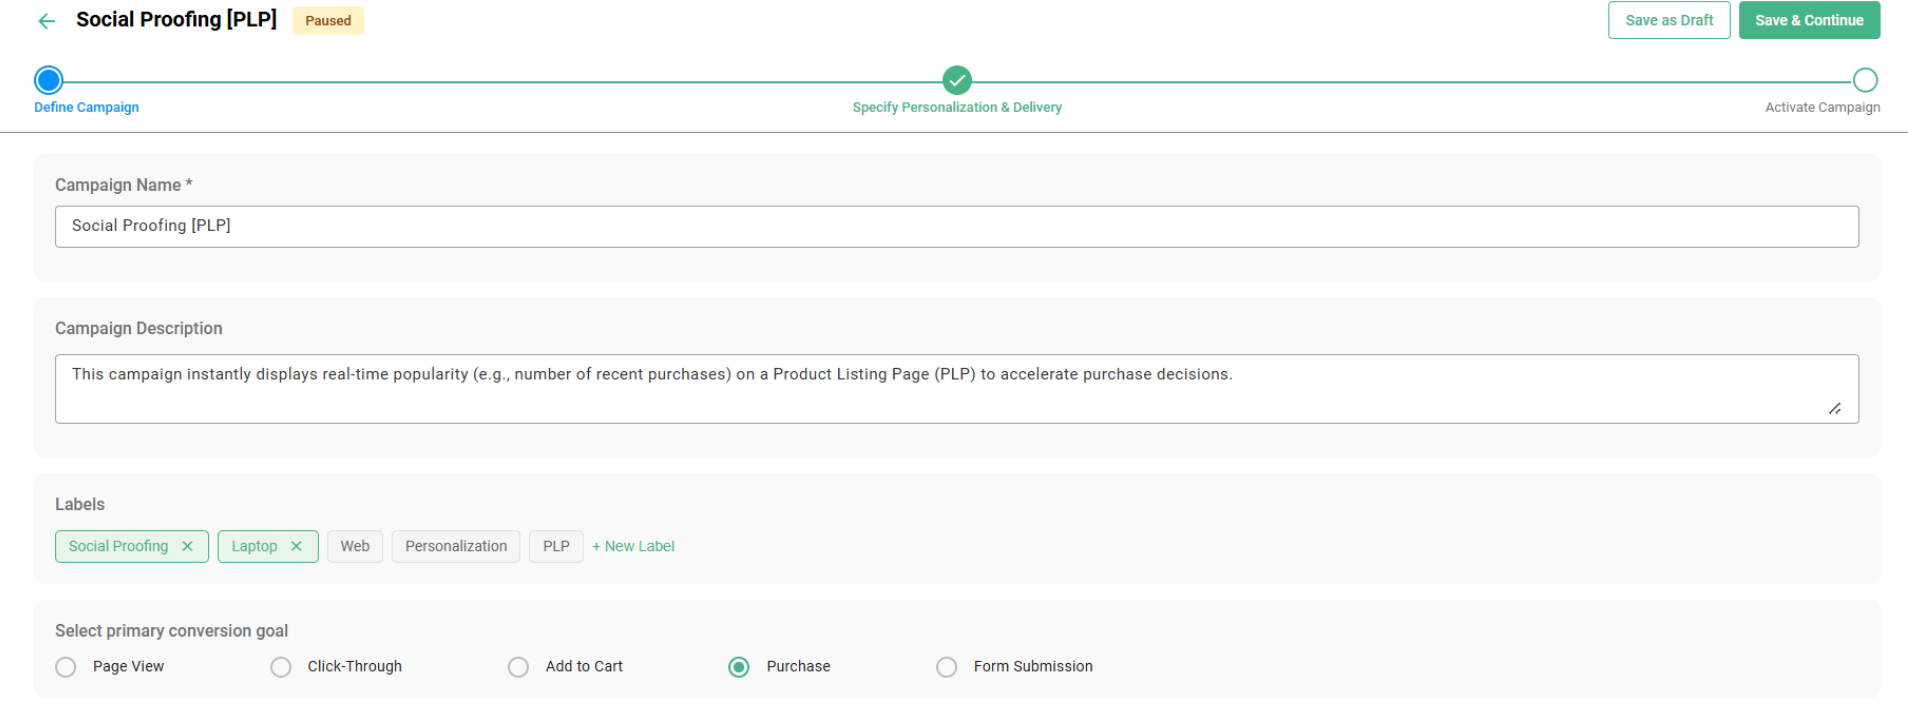
Click Save & Continue to proceed to Step 2.
Step 2: Specify Data Calculation & Trigger Rules
Step 2 is the core of the Social Proofing setup. Unlike standard targeting campaigns that use a complex rule builder, Social Proofing uses a streamlined Configuration Card.
This card is divided into three distinct logical sections: Data Calculation Scope, Data Selection (Signals), and Display Thresholds & Formatting.
A: Data Calculation Scope (Global)
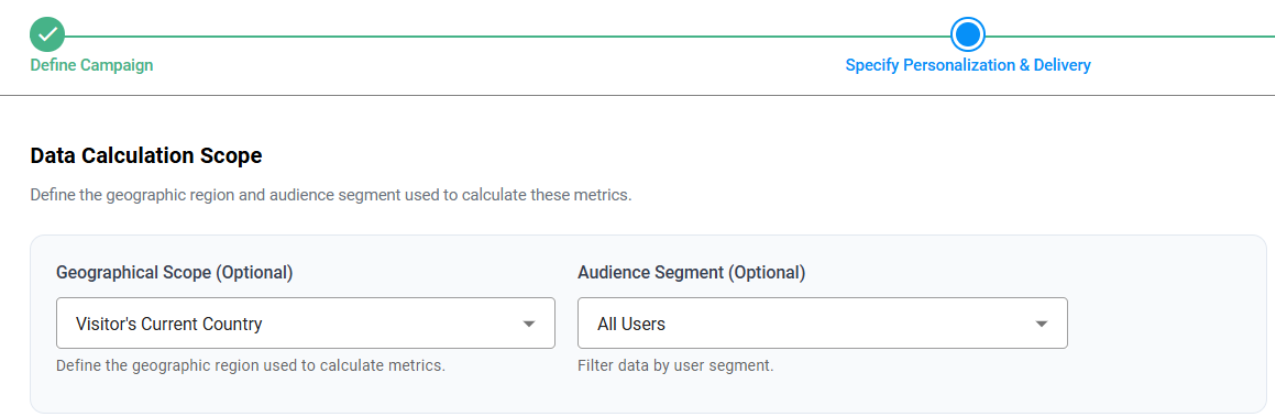
This top section defines the pool of data the system will use to calculate your metrics. These are global settings that apply to all metrics configured in the campaign.
-
Geographical Scope (Optional): Define the geographic region used to calculate the metrics.
-
Default: "Visitor's Current Country" (calculates metrics specific to the viewer's location).
-
Other Options: "Global" or a "Specific Country...".
-
-
Audience Segment (Optional): Filter the calculation data by a specific user segment.
- Default: "All Users".
- Rich Selector: If changing from "All Users", you can search your audience library.
NOTE: Data Calculation Scope dictates whose data is counted (input), not who sees the final message (output).
B: Data Selection (Mandatory)
Here, you select the specific activities (KPIs) and the timeframe over which they are aggregated. You must select at least one metric and one time window.
-
KPIs / Metrics : Select one or more activity metrics to track (Product Views, Cart Adds, Purchases).
- Note: You can select multiple metrics simultaneously (e.g., tracking both Views and Cart Adds).
-
Time Windows : Select the lookback period used to aggregate the data (e.g., 1 Day, 7 Days, 15 Days, 30 Days).
Note: You can select multiple time windows simultaneously (e.g., 1 day, 7 days).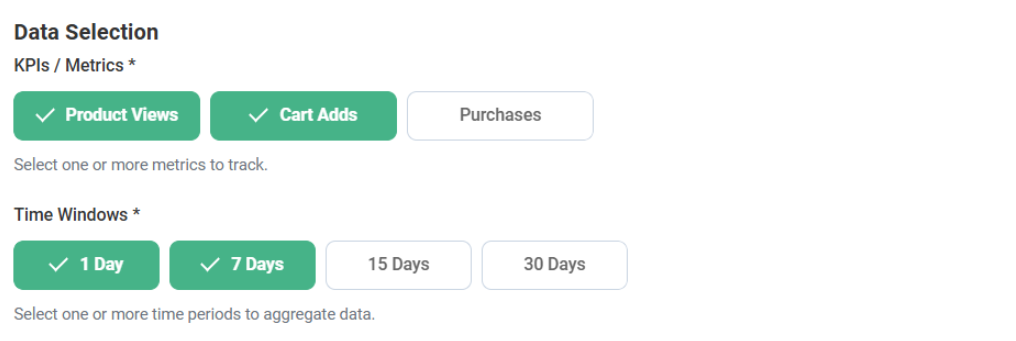
C: Display Thresholds & Formatting
This section governs when the social proof message actually triggers and how the numbers are presented to the end user.
-
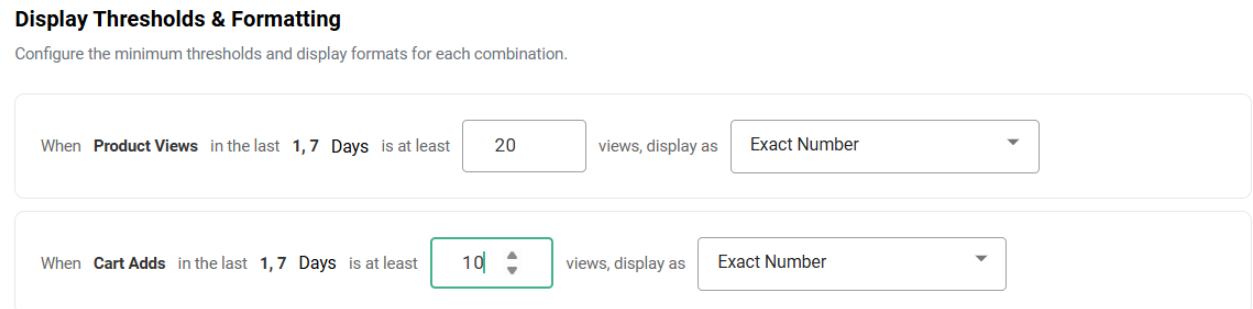
Trigger Matrix: The UI automatically generates a trigger row for every KPI you selected in Section B.
-
Minimum Threshold: For each metric, input the minimum count required to trigger the message.
- Example:
When [Product Views] in the last [1,7 Days] is at least [20]
- Example:
-
Badge Formatting: Control how the number is displayed to avoid awkward or overly specific counts.
-
Options include: "Exact Number" (e.g., 13), "Round Down to nearest 10" (e.g., 10+), or "Round Down to nearest 100” (eg. 100+), or “Abbreviate (1k, 1M)” (eg. 2k+)
-
D: Audience Targeting & Summary
This final block confirms the delivery logic of the campaign.
-
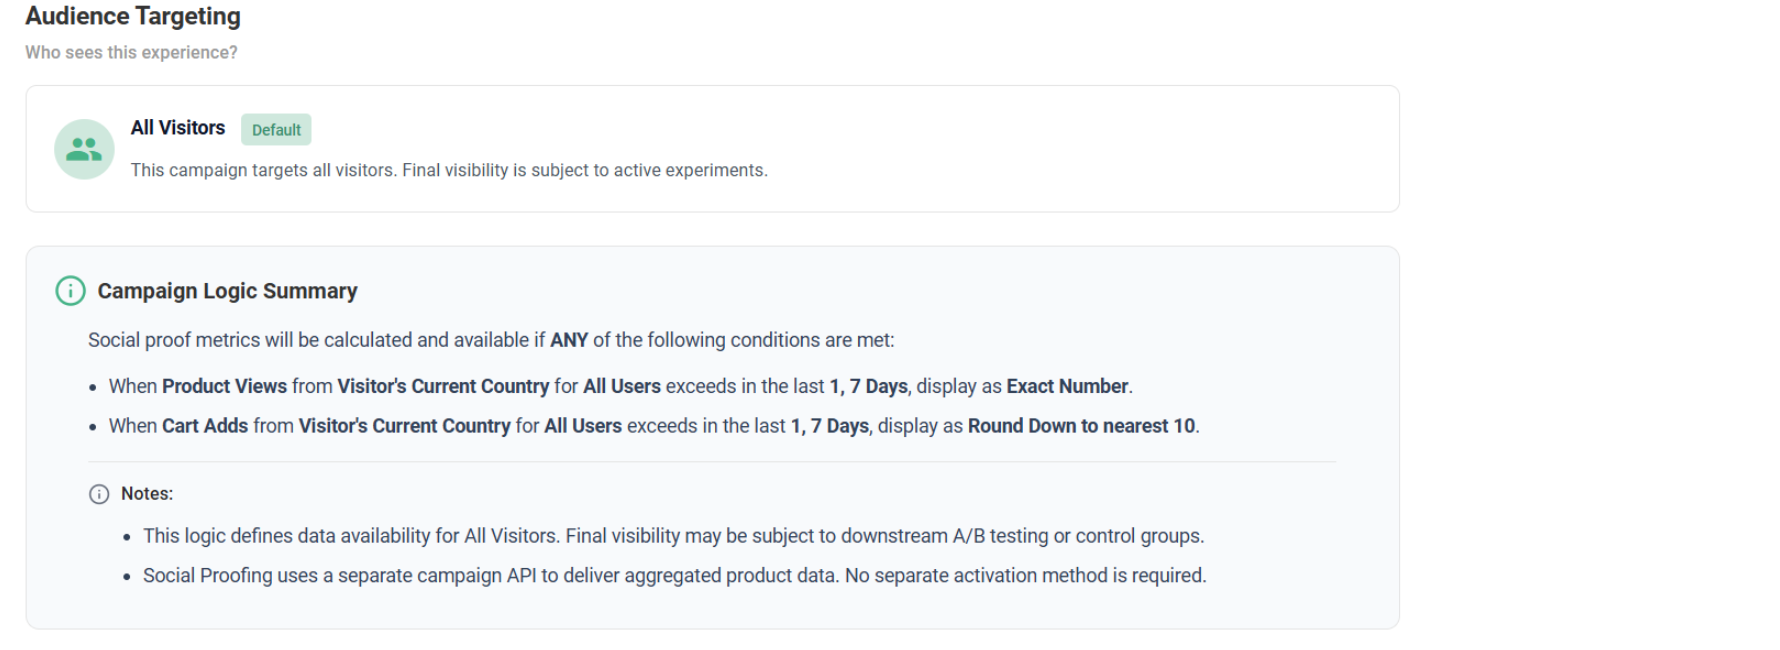
Audience Targeting: The social proofing experience defaults to "All Visitors".
- Disclaimer: While the campaign targets all visitors, final visibility may be subject to downstream A/B testing or control groups managed in your delivery platform.
-
Campaign Logic Summary: A dynamic, plain-English summary of your configuration. It explicitly states that the message will trigger if ANY of your configured thresholds are met (an "OR" logic model).
Click Save & Continue to proceed to Step 3.
Step 3: Activate Campaign
The final step dictates the operational timeline and data processing frequency.
-
Campaign Timeline: Define when the campaign starts and how long it runs.
- Set a specific Start Date & Time.
- Choose a Duration (e.g., 1 Week, Custom) or select Always on for an indefinite run.
-
Scheduling Frequency: For Social Proofing, you will typically define how often the aggregate counts are updated (e.g., Batch -> Hourly or Daily)
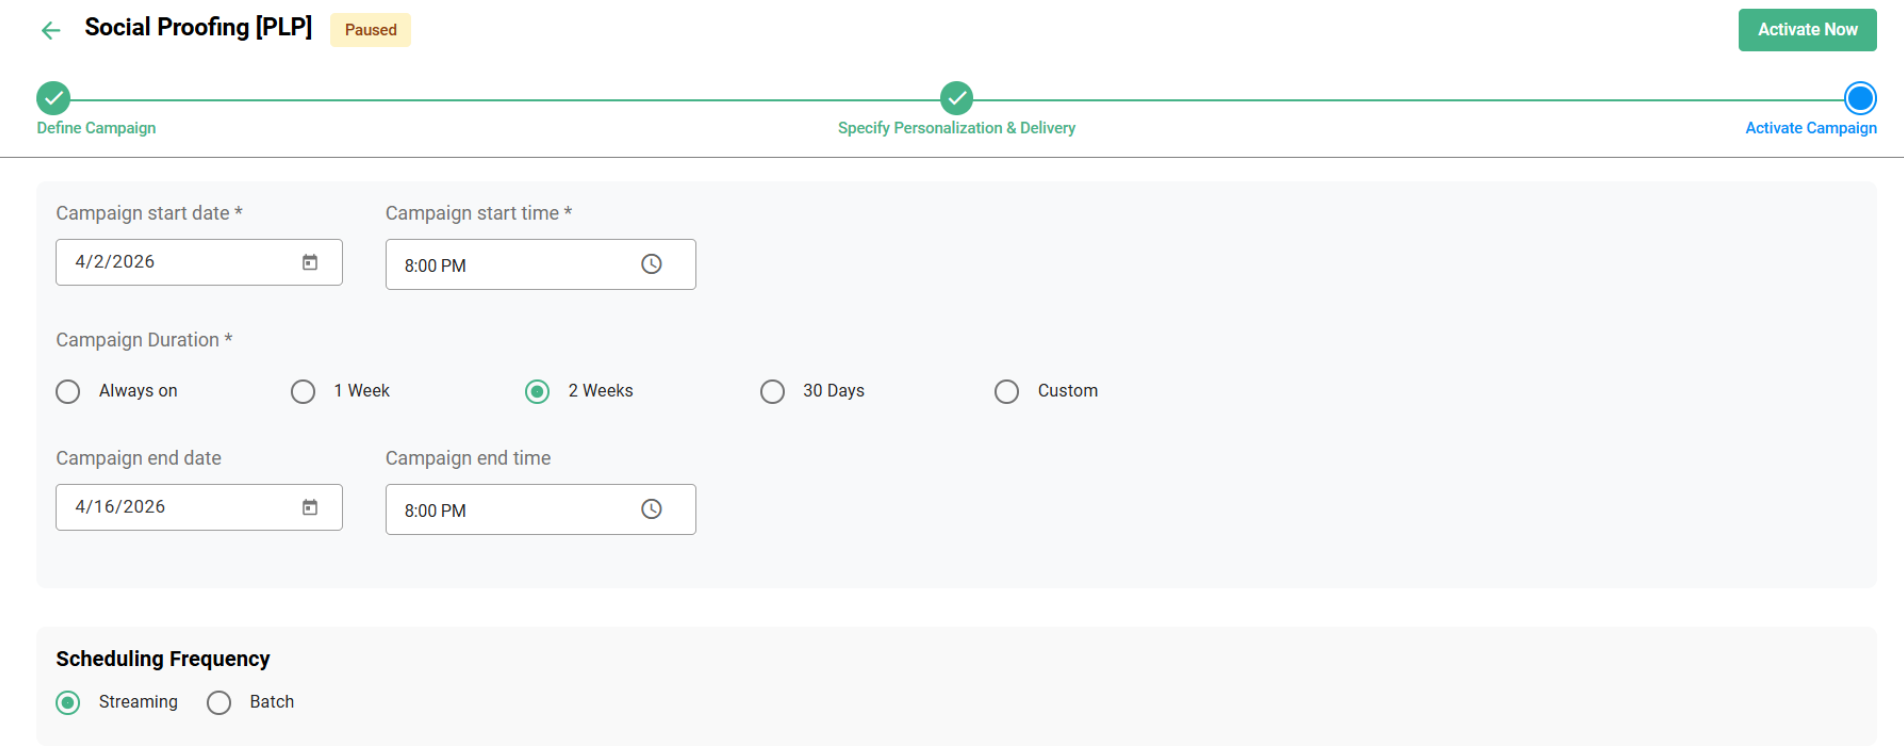
Click Activate Now to submit the campaign to the system.